Posts mit dem Label image transfer werden angezeigt. Alle Posts anzeigen

Samstag, 27. Februar 2016

"Memorabilia" - A kind of mixed media earrings, between new techniques and childhood memories


I was inspired by old paintings refined with gold leaf on wood of saints or virgin maria. There were some quite old ones in our home and they are a childhood memory for me. My father had from his travels and my grandparents these typical paintings. Thinking of it, I have to say, that they are actually a kind of mixed media work! It is this style that you somehow often find in temporary work (even if the topics and motives are different). 


The image is transferred on polymer clay, the halo was refined using gold coloured leaf (not real one) and the small charm then covered with resin. The sides are roughly cut to enhance the impression of old charms. My last image transfer on polymer clay was done quite some time ago. I don't know why sometimes I am "forgetting" a technique and why I start using it again from one day to the next. But this is my first transfer that I overlaid with resin. There were some troubles but it all worked out in the end. 


The ear wires are pure brass while otherwise the used metals are a combination from bronze alloy, steel and brass giving an old, vintage impression. I really love them!


The dark red glass beads move beautifully and even while the earrings are quite long, they are not heavy!


You can find them in my shop here :)

Sonntag, 14. Oktober 2012

Have a look! - More of polymer clay eyeballs


A lot of eyes printed out with a laser printer! All of them are images from real eyeballs I just changed the saturation, contrast and also a little bit the colour itself so that they are brighter! 

I was asked to go more into details with my eyeballs as well as image transfer and yes... I nearly forgot but I took pictures from the process creating this eyeball jar (more pictures here):


I just little empty honey jars I had (or rather: my family had at home! I was there taking a look at the house while they were abroad. So the prize was: Some jars lost to their daughter ^^).


You see the difference between a normal (left) and a very high colour (right) saturation? The last one works better for image transfer because you always lose some colour due to the transfer process.


I cut the eyes in shape with a little border left. 


To see my other eyeball tutorial: have a look here. I just use a very similar technique: Making a ball from white polymer clay (fimo classic) and pressing it in form. 

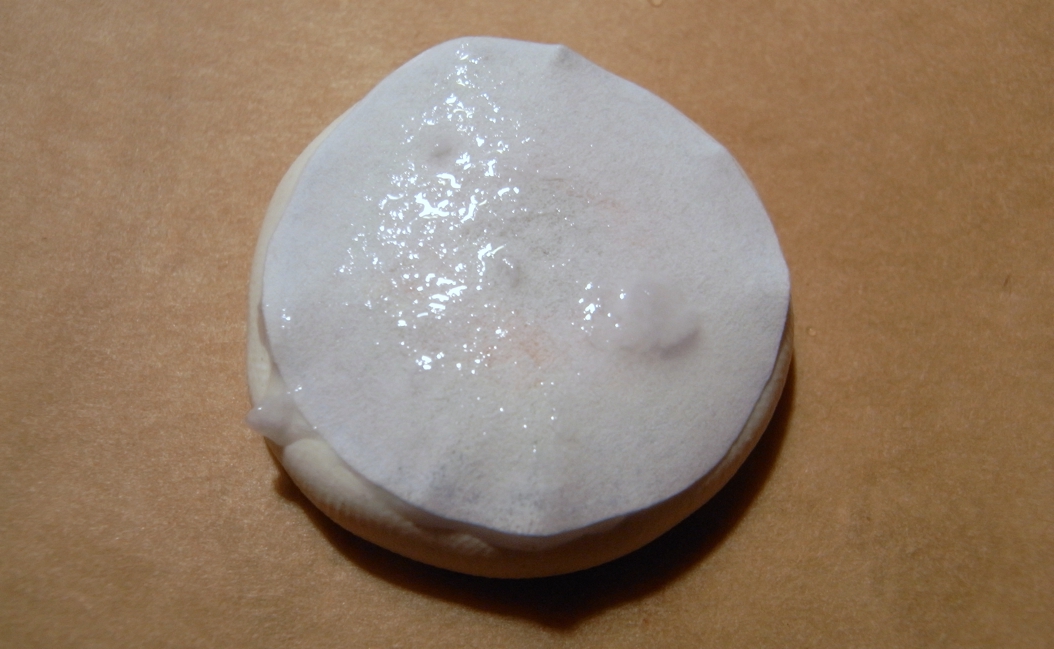
Lay the eyeball image on top and press it carefully but firm onto the clay.


Use some water to wet the paper. Just give the water a minute to soak through the paper...

...you will start to see the image through the wet paper!


Now starts the process which will take some time to really get used to but there is no other way than trying it again and again. In the end you will be surprised how easy this is! You just have to get a feeling how to rub the paper fibers off without smearing the image in the clay.


The fibers start going off. I am working in circles from the center to the outside. But I know that friends use other techniques and they also work quite well.


...more and more...


In the middle it is now perfect. No more pressure needed. There are some paper fibers left and as soon as they are dried you will see them clearer and they will hide a little bit of your image. But there is no need to remove them all. As soon as you add shiny gloss it will look again like in the wet state! 


And really: Add at least 5 to six layers of shiny gloss / lacquer. It makes a great difference! (while being such an easy trick ^^)

That was it! :) Of course adaptable for all kind of image transfers!

PS: Yes, I have a lot more to show you... still... no quiet moment was avaiable... but I will take my time in the next days to prepare all the pictures and blog entries! :)

Montag, 1. Oktober 2012

Vintage birds - earrings


The earrings are made out of polymer clay (Fimo). I use some bird images which I found at Karens graphics fairy. The colour saturation and contrast was set to high (just use the word image tools, not moe necessary). 


For the image transfer just try out fimo classic and not fimo soft, I tried that too often: Don't work. It seems to work at first but then the colours are getting messy and sticky and will smear over the clay. Not happening with fimo classic. I never tried over polymer clay brands for image transfer so if you have experience with them and image transfer, please let me know! I am curious :)


I really like how the colours pop out! Like tiny vintage tiles :)


...and some bird cages...


...as last step: 5 to 6 layers (at least!) of shiny gloss...


Mittwoch, 12. September 2012

It is watching you!


I combined my polymer clay (fimo) eyeballs with some structured stuff also made out of fimo and put it all again on a little glas.

Now it is watching you!


This time the basic colour of the polymer clay I used was a dark brown. I went over it with black acrylic colour. Before the paint could set I went over the surface with a wet sponge to remove most of the colour. 


For the highlights / metallic effect I used at first copper and then bronze metallic acrylic paint (the ones from Reeves, really good quality!). Of course followed by a lot of layers from lacquer / shiny gloss. Especially the eyeball got some more layers! ^^


For a little eyeball tutorial: Have a look here

For another glas with polymer clay: Have a look here


Mittwoch, 22. August 2012

Like little tiles for your ear!


This dragon fly over script is one of my favorite images at the moment! I made it with gimp (freeware). I really like this program to create layers of images! 

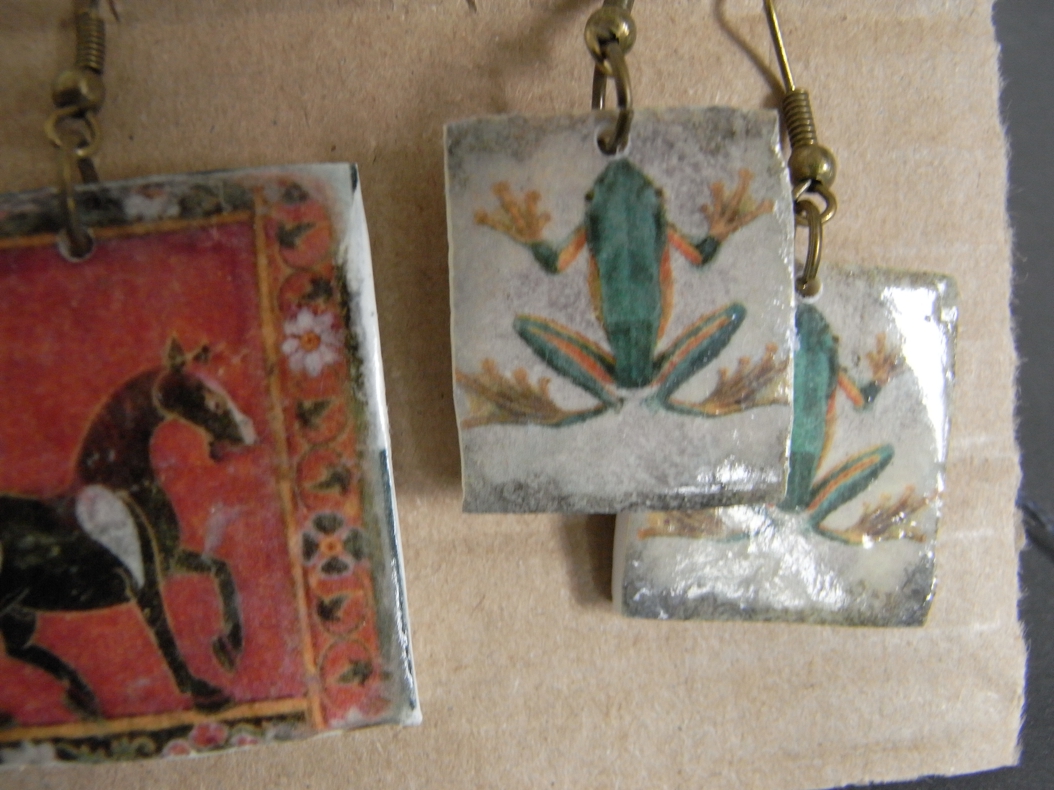
Of course more of the gorgeous nepal horse images!


And a little frog over a dark textures background...


You see: I use old card board to store my earrings!


Also some little frogs over script... and some ship wrapping octopus ^^


If you want some of the images: You can find them at bibliodysee! There the original sources are all also linked, love it! :)


And now another one of my favorites:


The pattern... the colours... arn't they great?!


And they are all to be found at the Galerie Sued in Leipzig! 

(Of course you can mail me if you want some too and can't come to Leipzig ^^)

Dienstag, 21. August 2012

Write more letters!


Or wear some letters as earrings! :) More of my letter earrings which are made out of polymer clay (Fimo). 

And now some (at least for me and my ego! ^^) exiting news: You can buy my earrings now at the "Galerie sued" in Leipzig!


Karl-Liebknecht-Strasse 84.

Öffnungszeiten

Montag - Freitag von 10.00 – 18.00 Uhr
Samstag von 10.00 – 14.00 Uhr
Und nach Vereinbarung

I was passing by one day and had a look at their beautiful "stuff" in their window. Going from fun jewelry to real gold smith work. And there was a tiny voice in the back of my head which told me to go into and ask whether I could show them my work. This voice is just an imaginary one but it belongs to lisbonlioness (have a look at her blog "Three bed semi" here!). I don't know how she sounds in real life but I know how she sounds in my head ^^ And you know what? After showing them some of my earrings they wanted to have them! We will try now for the next three months how it will turn out :) They have now different kinds of my earrings for comission: 

Beetle wings, casuarine, pine cones, little crochet ones and of course a lot of polymer clay ones! 

Including these letter earrings! :)

I'll show you more over the next days!

@lisbonlioness: Thanks a lot for your words!

By the way: The letter images can be found here:


...on top several layers of lacquer (Fimo accessoires gloss varnish)...


...they look like little tiles!


Samstag, 11. August 2012

Nepal horse book - Earrings


Again some earrings I made with polymer clay. For the image transfer I use the polymer clay brand fimo. But just the fimo classic works really well, not fimo soft. It seems that with fimo soft the colours get more "sticky" and will smear on the clay even if there is still a lot of the paper left from the print. And also even more problematic: It doesn't keep or rather transfers the colours like classic! The image will be really faint or with too much paper left...


If you don't have other polymer clay at hand than fimo soft: Use it. But maybe not for the first time trying some image transfer because the chances are high that you will get disappointed. 

I like the rough edges of the images on the clay. They create the feeling of a little tile worn over time... 


I use quite a lot different resources for my images and this horses come from Bibliodysee. The original images are taken from a nepal horse book, which may be dated to the 18th century. More details over at  Bibliodysee  :)


Donnerstag, 9. August 2012

Painted pictures and clay!


I started to create some beads for a art bead challenge but due to the date to defend my thesis and my holidays I never finished my entry in time. The plan was for a bracelet and it is nearly finished. I'll show it to you as soon as the last touches will be done. 


But one little and fast side project was this pair of earrings I made with two leftover beads! I used an image from picasso for the transfer. You recognize which one? :)


Dienstag, 7. August 2012

Letters on clay! (image transfer)


There is something very special to image transfer on polymer clay. The technique is simple or at least the theory is simpel. The practical side is not. It means a lot of trial, of getting a feeling for the material. But I think this is one of the reasons I am drawn to it!


You just print out your image with a laser printer (or in a copy shop). Don't use an ink jet printer because the colours have to be water resistant or better to say, they should not be solved by water. Just press the image on the polymer clay (I use fimo), let the stuff in the polymer clay have some minutes to start solving the colours out of the paper and then wet the paper on the polymer clay with water.


Now the great as well as problematic step comes: Gently start rubbing of the wet paper from the clay.... but without disturbing the transfered image / colours! The only way to get used to it: Practice! 

And don't forget, this is not about perfect image transfer. The little imperfections make your stuff beautiful and living! :)

Last but not least: They already got a new home! 


Sonntag, 23. Oktober 2011

All the colours - Image transfer on fabric


You need: Pics made with a laser printer, tight woven natural fabrics, acrylic stuff, too much patience and "a" Silke from "für große Mädchen" to experiment long days and nights ^^

I still have to work on my method to get rid of all the little paper leftovers and to be more careful with the edges... Silke said I could wash it at 30 °C even. Like all prints you should be careful to wash it on the left side! 


Still: With the fabric I have to do a little bit more experiments to get the surface really "sealed". But already love it! 

If you ask me how to make textile prints I would really suggest to try out everything! Because of the different brands, printers, etc there doesn't seem to be one solution for all and everything. 

You can also do the aceton transfers I made on fabric instead paper! (have a look here) Try out every glue you have as well as acrylic stuff, solvents like aceton or just the stuff you use for cleaning brushes covered with oil paint, sometimes (like beautiful autumn leaves!) just adding water and heat may give some kind of transfer... 

And yes, there is a lot of ready made stuff out there from the companies, but please always have a look what is inside because a lot of times not the stuff itself but just the product packages are changed ^^


LinkWithin

Related Posts with Thumbnails