2011.
This year it is surprisingly easy to adapt to the new number. Maybe because I am really happy that the last year is over and there is a new, fresh one in front of me. Yes, I know, in the end it is only a human made calendar. But it is good to have defined end and start points. :) Okay, let's go over to the more crafting related things.
One of my christmas presents was a purple filofax (size: personal). A real beauty! I am now starting to put everything I need in it... dates, numbers, informations... etc. But there was still the need for something more personal in the filofax. Once using it there will be a lot stuff developing by itself... but... there had to be something from the start!
So I created a new first side.
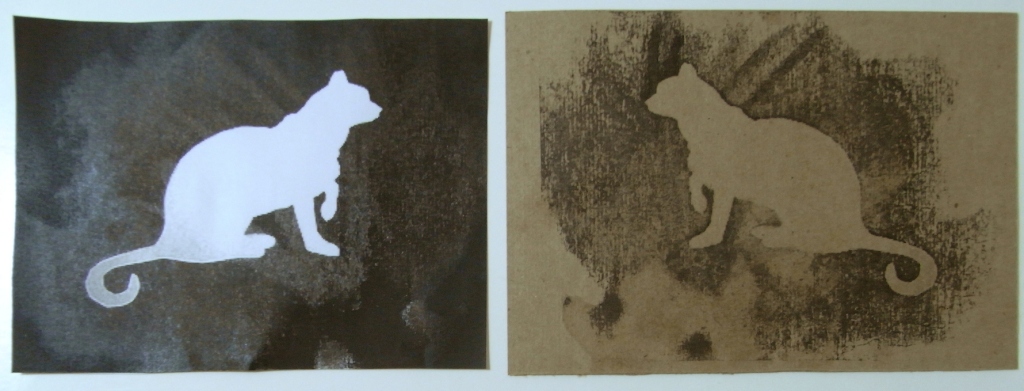
I just used old calender sites (the last half year of 2010 was still included) as my stencil. Just cut out a piece of cardboard (really just packaging stuff but cool one! Better than every kind I can buy), mark the little holes and punch them out. Yes, it is time consuming but doing just one side I didn't mind :)
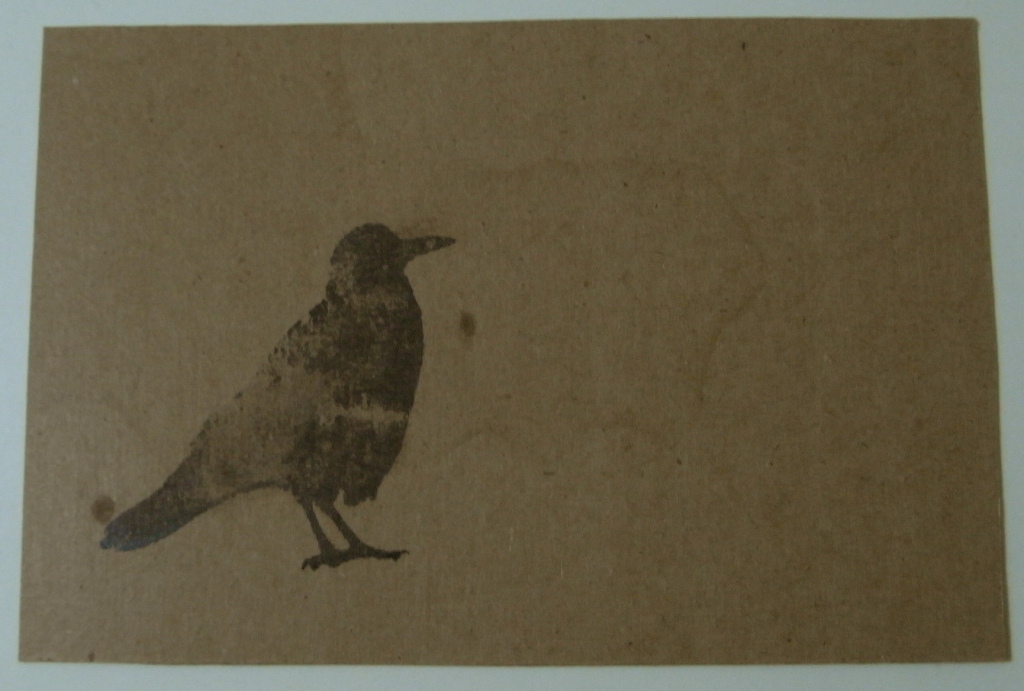
I printed the zebra from
graphics fairy (Ha, you would never have guessed ^^) with a laser printer out and transfered it with some aceton onto the cardboard. Just apply some aceton on the back of the paper, rub gently and peel the paper off. There it should be! The aceton will dry really fast :)
But have a try before because this only functions with some prints and not with all. It seems that the age of the printer is important. Don't ask me why.... but with old printers it doesn't function and with new ones it does. This is an example for an old print... you see, won't transfer very good *sniff*
After that I added the words and tentacles with artistic water colours.
This isn't black but a dark grey! Sometimes it is better to use a dark kind of grey than black.
I am thinking about carving a Z3 (mirror inverted) stamp... It's like a new little logo and I am somehow into it. Like a little word play. Strange because I only got the Z3 mirror inverted due to the aceton transfer ^^
I will add the brownie recipe for
decembersong. I got an
award for my blog from
centi which says to give it to more cool and small blogs but since this is mostly german I'll have a little difficulty here (but I loved to get the one from
centi! :) ).
So insteadt of giving the award to more blogs I will just say here: Have a look at the blog of decembersong and her friends which is called "
some nifty things" (and have a look at the so cool
axolotl plushy! I hopefully will also get one in exchange for something from my stuff!). This is really something for
lisbonlioness because decembersong is also an in the best way odd german ^^ We are out there! A lot of us... whether still living in germany or somewhere in the rest of the world. For some explanations of all these... just go over to
lisbonlioness and her
Three beds semi!
And also have a look at
centis blog too and especially at her
cute mushroom "collection" (fotos as well as crafted ones). Starting from
centi you could have a look around some german crafting blogs and although they are mostly written in german I think the pictures are most of the time self-explaining.
(Which is not mine but the family one I only adapted a little bit... ^^)
The normal one is quite easy...
- 150 g (to be honest I always take 200 g) dark chocolate, but the real good dark chocolate with 70 % cacao or more! No chocolate for coating or milk chocolate or cheap chocolate... it makes so much of a difference in the taste!
- 250 g butter
- 1 3/4 cup demara sugar (the real one which is not processed and NOT just coloured ^^ this is also so important for the taste)
- 1 cup floor (in germany type 405, I think this would be like the all-purpose-floor?)
- 5 eggs (size M)
- a little bit vanilla or vanilla sugar
- let the butter soften at room temperature, mix it with the sugar and then with the eggs...
- add the vanilla and the floor...
- melt the chocolate and add it to the dough
At this time the dough is really fluid ^^ I normally use a spring form where I cover the bottom with baking paper. I use a little bit butter for the sides of the form to grease it and then cover it with really small breadcrumbs. You won't taste them but it will be so easy to remove the cake after baking! With the breadcrumbs it won't ever stick to the form. Love this method and use it for all kind of cakes ^^
- preheat the oven to 180 °C
- back it for 30 min (it will still be a little bit fluid inside, it will set while cooling down) for the original taste
- back it for about 40 min to get a more dry normal chocolate cake consistency (but why make a brownie then? ^^)
For some time now I always add some highly concentrated coffee to the dough. Dark chocolate and coffee... normally I am not a person who can't get enough from dough but with this combination I could eat the whole dish!
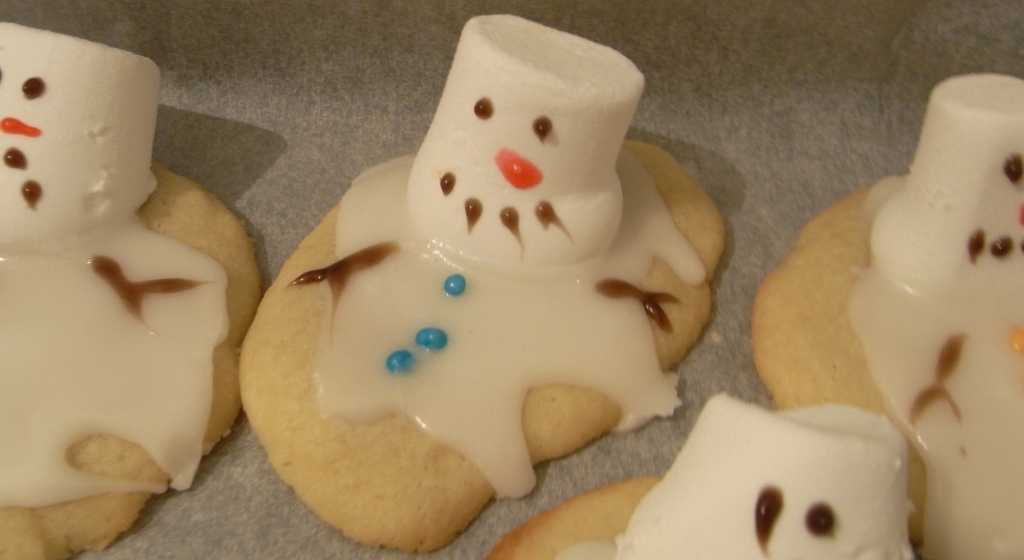
But there is a lot of stuff which taste great and can be put inside the brownie... I love the taste with amaretto. Just all kind of nuts are great, whether powdered, chopped, roasted... marshmellows are also cool... dried fruits... Puh, no end to that!
And don't be worried about the amounts. No egg is the same, demara sugars from different companies also tend to be different and so on... The recipe always works whether the dough is a little bit more fluid or not :)
But never add baking soda! Never!
If you won't eat the brownie that day I hoghly recommend to cover the brownie with chocolate. Either with chocolate coating or with chocolate with some coconut oil added...
And then: Add tentacles formed out of marzipan! For this you just have to mix marzipan with a lot of powdered sugar until it is really "hard".
My latest one with tentacles (
from this blog entry).
You can find more of my tentacle cakes
here. Brownies in a jar / Zebra brownies:
For my
zebra brownies I made a dark chocolate / coffee version and a white chocolate / vanilla version.
Then the real work started... I had to adapt the temperature and the baking time. Puh, the first ones where really fluid (although they still taste great ^^), for some I used way too much dough and during baking the whole brownie said hello over the edge of the jar!
In the end the best conditions (for my oven!) were the following ones:
- Fill 1/2 to max. 2/3 of the jar with dough
- use 175 °C
- bake the whole stuff for about 40 min
Close the jars instantly! Be careful doing this because 175 °C can really burn your fingers...
If some brownie went over the edge just cut it away and then close it ^^
Okay... I don't like enter recipes in my blog. To make a brownie is such an easy recipe! But only to get this written down it took... some time.
Edit: The editing functions of blogger are today somewhat strange... and not doing what I want them to do. Grrrml... First time ever this happens so badly with blogger.