Posts mit dem Label tutorial werden angezeigt. Alle Posts anzeigen

Dienstag, 10. Juli 2018

Seed pod polymer clay beads - tutorial for Art Elements


All the time I forget to link to my blog posts over at Art Elements, but not this time! ;)

I wrote a tutorial for these polymer clay beads reminding me of seed pods. The inspiration was this months theme for our theme challenge at Art Elements.... yes... seed pods!

Just have a look here!

Donnerstag, 7. Mai 2015

"Blue moments" - Earrings


Aren't these earrings lovely? Also they are really easy to make! With easy I mean easy ;)

The metal parts are from Vintaj arte metal. Black round metal pieces with a hole at the top and a beautiful pattern. All I did was to add some vintaj patina on top. After it dried I sanded it down a little bit. 


 I also have a metal hole puncher (1,5mm round), so I added a lot of holes at the bottom and attached some old czech glass bead dagger with bronze jump ring (and of course some ear wires).

That was it! They have a beautiful bohemian style, add a lot of colour perfect for summer and are a nice and fast project. One of the projects perfect be done together with friends and family who don't have a lot of experience but would love to create their own jewelery :)


Samstag, 31. Januar 2015

How (finally) I managed to oxidise my brass stampings!


If you work with metal and use liver of sulphur for oxidation you may know that this work well for copper and silver but not really good if at all for brass. Still, I like this small brass stampings. They are sturdy, cute and also cheap. I bought them on a craft fair and to be honest, there is never a great selection but the dragon fly and frog is cute enough.

Cute... but bright golden yellow shiny (aka as not mine)...

Here is how the looked at the beginning.


...and here is how black I can get them after oxidation with liver of sulphur! Okay, the dragon fly on the left got just a little bit of darkening and I also brushed a lot of but the others are a lovely blackish colour! They have a little bit of shine due to renaissance wax.


How I got there? By heating them up with a torch! Brass being mostly a mixture between tin and copper heats up quite easily. You have to be careful how to treat it (and yes, it is easy to make brass head pins, the only necessary trick is to flux the wire before!) and not to overdo it but also to heat enough. Mh... but to be honest... you don't have to be too careful. These little brass stampings are not expensive and there is not a lot that can really go wrong. 

If it does not oxidise enough after heating/pickling, just heat them up again. If you heated too much (which is not soooo fast done with a micro torch, I didn't manage until now!), it is just melted. Since the small stampings are not expensive, that is okay.

On the upper dragon flies I got a nice heat patina. Lovely! Now I have to try to preserve it (I know, I know... not really easy/possible). On the middle right butterfly you can see how flakes fall of the stamping after the heating. This is mostly tin while the surface now has more coppery tone. And yes, that means more copper on the surface!

Just a mild pickle (I use normal household vinegar and salt and just add a bit of boiling water to get it warm) and then you can use your liver of sulphur! 


Look at the pink shades...! If only I could preserve them...!


So there it was. My simple and easy trick to get my brass stamping black! (or just a little bit duller, darker, more colourful ^^)

I am posting this because I stumbled over so many postings online from people trying to get their brass. Originally I thought how easy this was, I mean after all this is also how it functions with the oxidation of brass after being etched (you get more copper at the surface on the etched areas because tin and copper react different). Treating now a metal mixture with heat where both kinds of metal have different melting temperatures just was a small jump for me (first thing I did after is was not working with just really hot water and liver of sulphur). But then I thought if so many people are trying to do this: Here is my trick and I hope it may be helpful to you :)

Sonntag, 1. Juni 2014

"Little skulls" - Polymer clay tutorial


Uhm.... to be honest, I forgot about this tutorial. As you may see from the hairpin with the skull... this was part of the advent calendar I made for my sister 2012 (I made advent calendars every year for family and friends). I made more little skulls and they were all used to create hairpins. Even if the quality of my pictures is not the best, I thought after I stumbled over it again, it would be nice to show you! :)

On a sidenote: When I brought them to the fair mostly men bought them... and used them as a tie pin! Have to find some blank for tie pins and made real ones ^^

I started with white polymer clay (fimo classic). I used leftovers with little dust in it so this tutorial is perfect for leftovers like this (and we all have polymer clay with dust in it, nai?)!

I rolled a ball, roughly formed it into some kind of pear and pressed it down. For this step as well as all others in this little tutorial: Dont try to make anything perfect! There is NO need for perfection! It would rather take away the organic and funny look. Also: Embrace your finger prints, they add texture ^^


I used mainly a knitting needle and a scalpel (or sharp paper knife) for the modeling. Now I would use my ball point tools but you really can use anything you find in your household. Pens, kitting needles, other end of a brush, wooden food sticks... you get the idea.

I pushed in the edges to get a more pronounced "skull" shape. Still you can see the imperfect rough edges. I then started with the eyes. Just a dot in the middle and then I pushed the holes bigger (circulating the knitting needle gently inside). I like the big eyes! 


A simple heart shape for the nose (or rather the missing nose... ugh...!). I gently pressed don the lover area for the teeth and then simply pressed lines down.

You have your skull!


For variations: Cut out a single teeth... make different eye shapes...


...make them angry or worried... a bigger rounder head is also cute as is my favorite: Different eye sizes!


Also nice is to create the teeth by just cutting with the scalpel one horizontal line and then several vertical ones. This has the look of a skull with the lower jar still attached.


Last step: Paint everything with black acrylic paint (I used Reeves) and wipe it away while still wet. Then just sand the surface of the skull to enhance the white there! That was it, easy as easy can be ;)

Of course you could also add some colourful flowers to get a more mexican style. Use brown or grey insteadt of black to create a softer, not so comiclike effect...

from the advent calendar

Montag, 3. Februar 2014

Blue flowers and a tiny wee beading tutorial...


Yes, a really tiny tutorial but hey, I already sketched it so why not show it? ;) 

Heather Powers from Humblebeads gave out a Super Bead Sunday challenge yesterday. It was inspired by the super bowl in the US and while I am neither in the US nor a fan of this game... I loved her inspirational colour palettes and had to play along! 

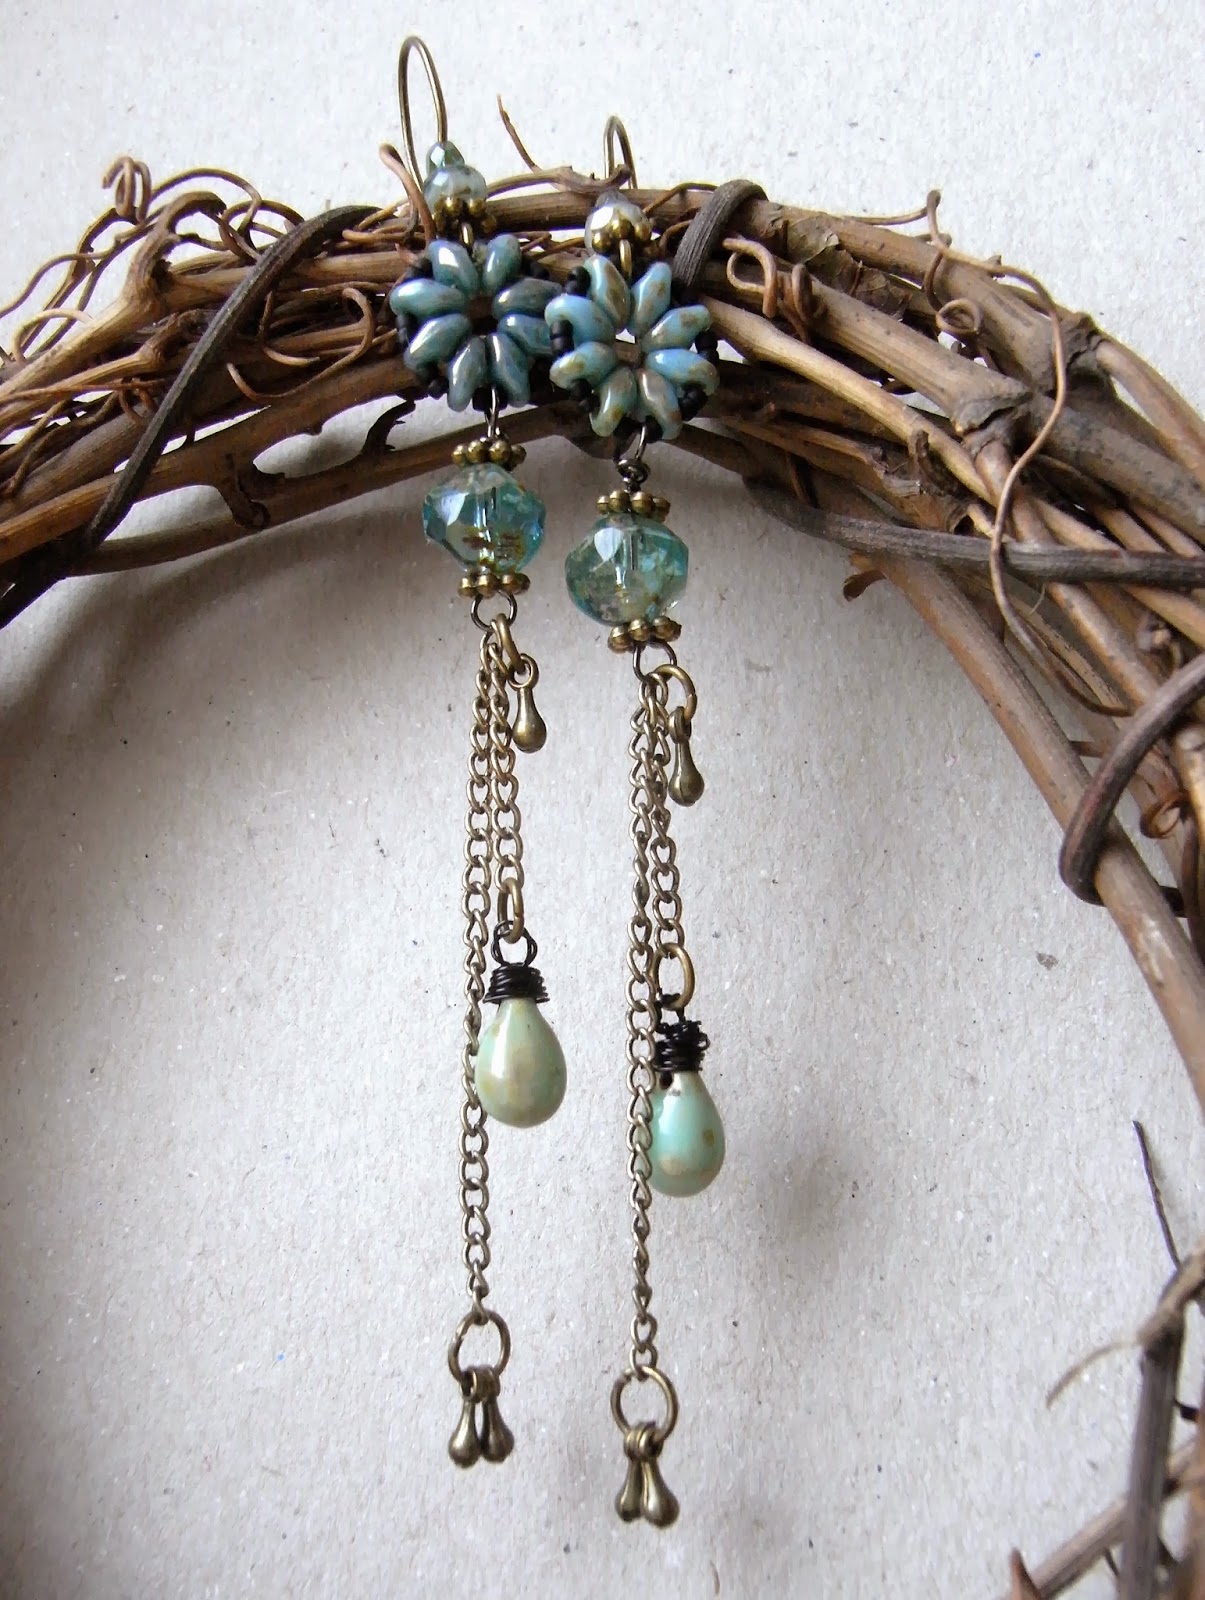
I made with duo (twin) beads and seed beads (15/00) small beaded flowers (or also just circles / mandalas... you name it). They are really simple but I love their look. I added a lot of czech glas beads with picasso finish (I got them all including the duo beads from The curious bead shop), some chain and metall drops. 

There are quite long, without the hook 8,5 cm (3,5 in) and with the hook and the beads on it 10,5 cm (4,1 in). The slightly touch my shoulders if I move my head. But there are really light and due to this play nicely while moving.

Oh, and here my tiny wee tutorial!


String 8 duo (twin) beads. Go through the first bead again. Make sure you got through all beads 2 times in total (always the same hole) and make a knot to secure. Then  go with the thread through the outer hole of a twin bead, take 2 seed beads (15/00) and go through the next twin beads. Make sure the thread is hold tight. Again go through all beads in the outer ring 2 times and make a knot afterwards.

Yes, it is tiny... but this is how I write / sketch down things like this :)


 This was the first made-at-night picture... still not a perfect picture at top on this blog post but getting better... maybe with sunlight and a new camera the quality will increase again. *sighs*


Donnerstag, 19. Dezember 2013

In the woods - polymer clay ornament tutorial (and giveaway :) )


Here is the tutorial for my christmas ornament I made for 4th annual ornament blog hop from art bead scene. This was the first time I participate after just seeing all the beautiful pieces every year :) Above you can see my "production line" for christmas. I want to give them to family and friends this year and hoping to create new ones every year (at some time one has to start, nai?). 

I made a mold with a stamp after falling in love with the image of the stamp. Normally I would not have bought this stamp, too expensive. But you see the tree sceleton, the little owl and deer and it is snowing...?! 


A clear case of: Want!


But I am not a fan of impressed images at least not if you have a kind of landscape. Somehow trees and animals have to come "out" of the clay and not go in. Not a problem with patterns just with rather living things and as said landscapes. So I made a mold from the stamp with super sculpey firm. I think you can use any other polymer clay that is a little bit harder like fimo classic (but not fimo soft for example!). But this one I bought for Rumpel because he found fimo classic still being to soft to create sculptures and I have to say this clay is really, really great! Only available in grey but really strong and hold fine details perfectly!


The easy part: I stamped into a layer of super sculpey firm. You can see that I pressed a little bit harder at the lower part but that was okay for me. Bake! There is your mold :) I nicked the mold at the top to know the direction after I press clay into the mold. 


Because polymer clay likes to stick to polymer clay, especially in tiny structures, I use talcum powder (Penaten is a talcum powder for babies) to be able to remove my raw polymer clay from the mold. Because the mold has tiny details I add the talcum powder NOT directly to the mold but onto the clay before I press it in the mold. Otherwise you risk to put too much powder (even fine one as this) into the little details and block your mold.


Uhm... can you see all the dust and dirt I managed to get on my white polymer clay? I used Fimo classic in white by the way. Between taking pictures and kneading the polymer clay I managed to get dust on my working space. But other than looking bad on this image (that I show on my blog for all the world to see... *blushing*) it doesn't matter. It is just on the surface and later on I will paint and sand the piece. All the dust and dirt will be gone!


Press your polymer clay firmly with your finger tips into the mold. Make sure you really pressed at every area. I like to go around with my thumbs over the surface, starting from the middle to the outside. This is also the reason why I made the little nick / mark so I know where the top side. While pressing the clay in I am moving the mold quite a bit and if I want to write something at the backside I want it to be upside. 

While the poylmer clay is in the mold, I start to work on the backside. You can use stamps, texture sheets, write on top with a gel pen (it is water safe after drying and the gel paint goes really good into the clay) or just press in any kind of pattern like I did here. I used knitting needles (best polymer clay tool ever!), an old tool from my zoological class and the back of a paint brush. 


I carefully remove the piece from the mold and put a hole at the top with a knitting needle. I always go from both sides to have a smooth hole. If you are afraid to disturb your image while doing this: Put the piece into the freezer for some minutes before you make a hole. You could also drill a hole after baking with a dremel.

Of course: Bake!


Here are the backsides of my other "In the woods" ornaments I showed you on top. Do you see the one backside with the letters turned upside down? Yes, that was the reason why I made a mark in my mold ^^As you can see I use really everything I get hold of. The backsides itself make beautiful ornaments.


Some more details... freeform pattern and clear silicone stamp...


...and even more... old jewelery pressed into, wooden fabric stamps, classic rubber stamps...


To add colour I use acrylic paints. My favorite brand is Reeves. Not too cheap, not too expensive, has a really good hold on polymer clay and such bright and good colours. I choose two colours (sometimes three but not more) for a single ornament. I randomly apply both colours on both sides.


Make a mess and enjoy it! I use old plastic lids for my acrylic paints that also allow me to mix or water down paints. Here I used blue, a little bit of white and purple. 


I remove most of the paint with a paper towel as long as it is still wet. I am not too accurate, I just want to remove a large amount but the fine details I am doing by sanding the piece later on. The backside...


And the front... Just let it dry before sanding. Otherwise it will be a mess. Yes, I already was impatient, happened to me. 


My torn sandpaper... and after sanding: Wash the piece to remove the dust, let it dry and then you may add some protection with gloss or renaissance wax or whatever else you like to use with polymer clay. You could leave it like this but I am afraid that the white would be stained to easily. But I don't know if this is really true just pure paranoia after putting so much work into one piece ^^


And after sanding! Now the contrast is really nicely enhanced. Also all the little stuff sticking to the clay is gone! As I said, don't worry to much!

Finished!


And the backside a little bit more sanded. Not too much, I like the rough edges, but enough to let the white colour pop out more.


Oh, and by the way, I also tried the mold to make little owl earrings. I still have to put some layers of gloss on them for protection (and also sorry for the blurry image but it was difficult to take pictures in the middle of the night and they started to roll all over the place... mph! ^^)


But you know what? Christmas is around the corner so why not to have a little giveaway? If you would like to have the "bead" in the woods I made here for the tutorial and also the little owl earrings (finished of course), just leave me a comment! Let's make it a short one: I will draw the winner on sunday, 22th of december, at 14 pm CET. I know that the shipping will take longer than christmas but hey, that would be something to look for after all the christmas presents?! ;)

EDIT: Sorry I didn't write it down! Of course this giveaway is open to everyone worldwide as long as the mail service offers delivery (the german mail in this case) :)
Also changed the picture of the owl earrings, they are finished now. I still don't seem to manage a good foto... I really need a new camera! Next year I'll get one.


Dienstag, 19. November 2013

Where to find the others...


Felt House Gift Tag Holder – I ManuFatti / Christmas Trinket Hoop Mobile – Carina’s Craft Blog / Felt Polar Bear Ornament – La Creature and You / Christmas Hoop – Claire Payne / Embroidered Christmas Mug Rug – Button Button / Polymer Clay Star Ornaments - Saraccino / Knitted Christmas Stockings Garland – Knit Me a Cake / DIY Christmas Ribbon – Adventures & Tea Parties / Embroidered Mistletoe Ornament – Bugs and Fishes / Scented Salt Dough Ornaments – Retro Delicious / Crochet Christmas Tree Decorations – Homemade@MyPlace / Christmas Cross Stitch Raccoon Ornament – Hugs are Fun / Polymer Clay Christmas Tree – Little Creatures / Christmas Wish-List Felt Envelope - Jumbleberries / Felt Christmas Tree Toy – Pinwheels and Stories

...of the crafty christmas tutorial link-up :) Can you see my polymer clay stars?

Laura from Bugs and Fishes asked a few weeks ago if someone would like to take part in such a link-up. I already have a lot of small tutorials and five minute projects on my blog. Maybe not as many as I would like to but this was one more reason to say yes. The most important reason? I really love Lauras blog. Her little felt animals always make me smile. I follow her blog for... a long time now and hey, I even won one of her books! (My first giveaway win ever!)

Let it Snow Embroidery Pattern – A Little Happy Place / Festive Wanderers Embroidery Pattern – Unexpected Kitty / Festive Felt and Fabric Coasters – Betz White / Holiday Ribbon Pillow – Mrs. Saint Nick / Felt Gingerbread Man Gift Tag – Grace’s Favours / Crochet Christmas Star Jar Covers – Dinki Dots / Edible Christmas Ornaments – Hydrangea Girl / Cross Stitch Christmas Trees – Made by Mrs M / Secret Love Letter Christmas Gift Tag – Crafts of Texture / Applique Love Christmas Card – Halcyon Threads / Christmas Mini Mitts – The Crimson Rabbit / Felt Reindeer Ornament – Pickle-Lily / Christmas Carousel – Aura Verde Crafts / Embroidered Christmas Stocking Ornament - Cocojude / Stencilled Christmas Embroidery Hoop - Angharad

So please go over to her and say hello and maybe have a look on the other tutorials. Just sweet little things to do with friends and kids. This is also why I made a simple little tutorial that will always turn out great, no matter how experienced or of what age the maker will be :)


Sonntag, 14. Juli 2013

Sparkling! - Make your own earrings studs (without any challenge ^^)


Okay, it is sunday. Here comes one of my fast little projects.

There is nothing special about it: Just easy and fast with a beautiful result! Perfect to make together with friends and family, teeny girls or people who say the can't craft at all (but love the results).

I have to admit: You need to buy the basic earring studs, the fitting glas cabochons and some sparkling colour (or paper or in my case just pure nail polish is needed). And don't forget the glue!

Can you see the gorgeous colours and all the sparkle?


It was really hard to catch all the shades of violett and blue with the sparkle in a picture. Still even more gorgeous in real life :)

What you need:

- earrings studs (I used the smallest available fitting for 8 mm cabochons)
- fitting glas cabochons (as said 8 mm)
- nail polish (or other colours / glitter / paper)
- glue


I also preffered the antique bronze over silver. The small cabochons are too cute. I will use them also with polymer clay. 

These are my nail polishes. Summer attack from P2 in 040 Hot berry and 010 flirtin' purple (I need all the other colours but coulnd't find them anymore... they were a limited edition I just found during the sale... if anyone has the palm tree green, please, I want it!) and from chanel 529 graphite. 

I get a chanel nail polish as a birthday present for some years now. Always with the special colour of the year. I love all the colour even if I just use it during holidays in the summer time. Working in a lab makes the use of nail polish at a every day basis impossible (the desinefction kills every polish... and also my nail ^^).


Now for the (short as possible) tutorial: Paint the back of the cabochons with the nail polish, let them dry and glue them into the earrings studs. Finished.


Nothing special but it makes fun to create them and they are really a perfect project to make together with others especially people not so used to create / make things.

I also looked around for beautiful paper and the effects I would get with my glas cabochons. I found some advertisement for chai tea...


The faces would look so weird! I am thinking about combing them with polymer clay...


...of course, always a favorite everywhere, letters...!


Now back to the studs: In red-orange-gold (hot berry) and silver-grey-green (graphite).


And my favorites: Blue-violett-purple!


Yes, a lot of pictures... but I already deleted quite a lot!


LinkWithin

Related Posts with Thumbnails