Posts mit dem Label swellegant werden angezeigt. Alle Posts anzeigen

Mittwoch, 15. April 2015

"Dreaming" - Bird mask made with polymer clay


Do you know this kind of surreal feeling: Hey, I actually made this? 
I have it with this bird mask. 

It is made with polymer clay (Fimo classic as well as a lot of other scraps of clay I had at hand... some of it even neon yellow!). At first I used a paper template to cover with metal foil and then a first layer of polymer clay and bake it. In a second step (a step that took weeks, I just worked on it from time to time) I created the beak and added the feathers. Every single feather was cut in shape and formed onto the mask. Just a very basic and simple shape with clean lines to make a feather but because they are all different, it is working really well. 


I covered the baked mask with surface prep from Christi Friesen "Swellegant", added a first layer of black acrylic paint and then several layers of "Swellegant" silver. It will fill out little gaps and small details are lost. But that is perfect because then it looks more and more like one single piece and not a combination of different pieces. In the last coat of silver I added the darkening patina while it was still wet. After it dried I coated it at first with the sealant before I added highlights with the silver again on top. I am using this order now since I sometimes had the problem that even after waiting for several days to let the metal coat and the patina dry, if I would add new metal to highlight raised areas it would also oxidise.  


The curve of the side nicely goes into the curve of the beak. 


Just look how well it turned out with the beak and the nostrils and the tiny wee feathers around it. The beak was just smoothed out by hand before baking and I left it as it was afterwards. This has the effect that in all that irregularities the silver and patina formed their own organic pattern.


Freitag, 4. April 2014

Once inside an egg....


...inside a "Kinderüberraschung" (a Kinder surprise egg). No, of course I didn't made pictures before. Just imagine colourful plastic pieces put together. Are you able to do this? To be honest, I am not and I actually saw the original plastic animal ;)


I glued the plastic animals on the lid with E6000 (where was this glue in my life until now?). After this I put two basic coats on the plastic and the metal: First the surface preparation of Christi Friesens swellegant paints and after this black acrylic paint from Reeves. 


Then I painted three layers of swellegant copper on top, waiting in between to let every layer dry. For the final and fourth layer I used the verdigris green patina with the still wet copper paint. Love the shades of green! Again... waiting for it to dry...


My last step was to add matt sealant and then putting some highlights with a dry brush and swellegant brass on top. Yes, I sealed first and added then the metall highlights (and sealed again). It happened to me that if I put the highlights without the sealant on top of the patina it can actually also turn green very fast (minutes sometime even).


Both of the glasses were the "packaging" for birthday presents for friends. You can see the presents (earrings of course) here and here :)

As it happens far to often in the last time... weeks... months... (months? ehm... yes, sadly true...) I took the pictures just in the last minute before heading to the birthday party. I even finished just at the same day. 


The idea of glueing plastic animals on some lids and painting them already is running wild for some years in the internet. I wanted to try this for a long time now. But I really think that by using swellegant I created something new out of an old idea.


And yes, you need them too! Your own little metal statues! ^^


Dienstag, 18. März 2014

"Far, far away" - a kind of steampunk and overdue challenges


It is still not finished... What if I told you that this was from our january / february challenge at the german polymer clay forum I am participating (polymerclaykunst)? The topic was "Gestirne / Metall" (celestial body / metal). 

I painted my own little galaxy behind a cabochon using different nail polishes. It reflects the light just stunningly and it seems to go very deep (shades of blue and violet). I tried to catch this on the photo but it is difficult. 

The pendant I made with polymer clay (fimo classic) and coated it in swellegant bronze that was treated with darkening and the blue patina (the paint line from Chriti Friesen and I still don't know how I managed to live without it ^^). 


Coming to the next challenge topic: "Traumzauberbaum / Mosaik" (dream-madic-tree... sorry, german just allows beautiful word combination that are not translateable / mosaic).

Here is a preview of the piece I am working on for this challenge. A mosaic of leaves and wigs and flowers... here you can see the patina solutions of a copper surface.


And of course a hidden dragon fly... :) Just now need to go on with these projects...


Samstag, 25. Januar 2014

Bird skull - somewhere on the way I got there...


With a bird skull made out of polymer clay (fimo classic) it seems to be like with a lot of other "topic" beads. Somewhere on the line... I also make one. I also made owls. And other things... ;)


I like the look. Just to go freehand without the pressure to be perfect. The imperfections are what make the look organic... and gives it a rather tribal feeling. I added copper wire and oxidized it with the green patina from swellegant (Christi Friesen).


I was also asked to create one with night-glowing polymer clay! On top of my polymer clay to-do-list!


Donnerstag, 9. Januar 2014

"Memories..." - Picture frames


I struggled with this blog entry. You may see why: Too many pictures... and what picture to put on top? I now went quite randomly because I honestly couldn't choose! 


I made picture frames with polymer clay (fimo classic) or rather I covered bought picture frames with polymer clay. I went for some cheap frames made out of wood so I could bake them. There were at the bigger frames some plastic parts attached but I could remove them safely and attach them back on later. If you also want to wrap frames in poylmer clay, have a look if you really can bake every part!


This said: I also used kato polymer binding medium or paste on the smaller frames. I was afraid that the polymer clay would not have enough grip to attach securely to the smooth surface. It was a mess but worth it: Was holding perfectly (yes, I tested it). It was not necessary for the bigger frames because they hade some rather ugly "raw" wood structures on top. Real wood made looking like fake cheap wood. Strange world. Afterwards I used the swellegant paint line from Christi Friesen to create this old and worn look.


It was late in the nights while I was working on these picture frames. Hey, at least I made some pictures of the process. I sadly forgot the first ones as comparison where you could see the original polymer clay colour (it looked weird ^^) but I have several ones to show you the process of adding the swellegant paints and patina on top.


I added several layers of brass or bronze paint from swellegant on the baked polymer clay. I always waited to let it really dry before I added the next one. Just with the last layer I added the three different solutions to let the metall oxidise while the paint was still wet. The solutions overlapped of course but I added them still at different spots. Just tipping generously on the surface. You see how beautiful the patina is blooming?


I also love this look when the patina is dried. The green and the light spots...!


But I wanted to have more layers of colour so I added a lot of different oxide dyes on top. I think I nearly used all the shades of blue and green avaiable from swellegant and also some purple and white. 


Again I added it randomly over the frame. It is hard for me to do this but I know that this creates the effect I am aiming for. 


I already rubbed of some of the patina and you can see the brass beneath ^^ Just because I am working really in a generous way with the paint, acids and dyes!


Afterwards I rubbed on some more of the metall paint on top. Just with a nearly dry brush I took a little bit paint, went over a paper several times and then went over the frames. This allows me to get paint on every small structure without just overpainting it. And yes, for this I am using a brush and not my fingertips (normally I am adding acrylic paint on my polymer clay pieces my hand ;)).


Just a comparison before and after rubbing on new metall paint... also the first layer of the sealant is on top of the right one. That is why it looks a little bit wet.


 And here the overview of the finished frames: two made with brass and two made with bronze.


I think the bronze makes better images... but seeing the frames in reality the brass is more striking and the bronze more subtle. 


The discussion now would be what to put inside... I would be voting for simple black and white or sepia pictures but as all four of them were christmas presents, I don't have a vote ;)


But I so need to make one for me. At least one... but you know how it is with creating something for oneself? Always at the end of the list somehow.


 And sorry... but I just can't delete more images. Believe me, I already deleted a lot from this blog post!


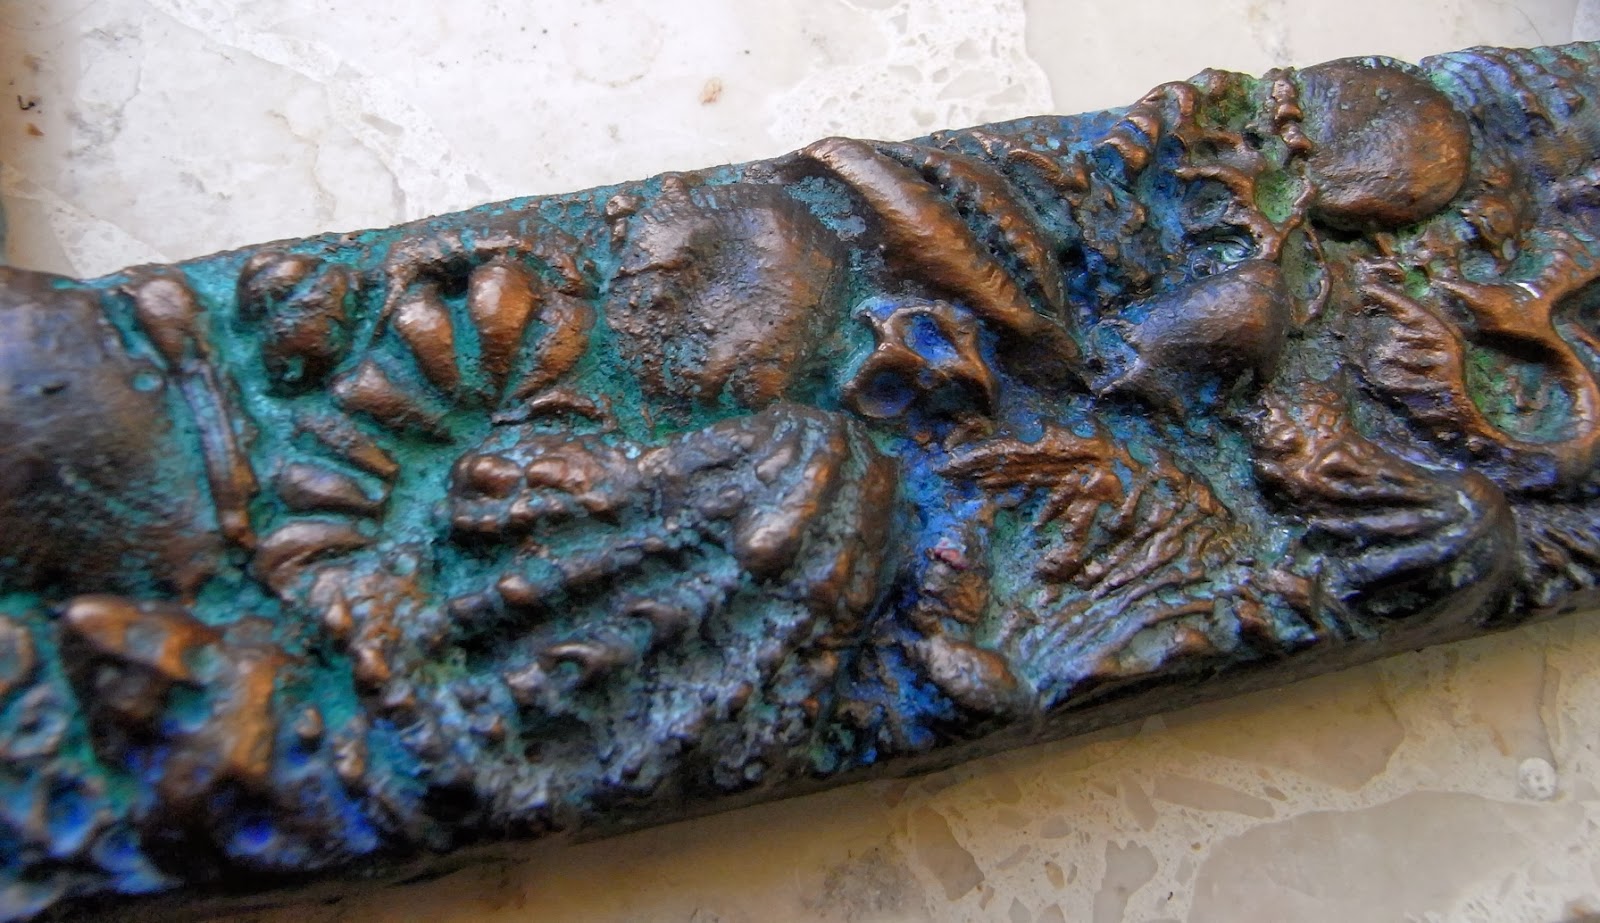
Just look at all the small details...


As you may already have imagined from the repeated and quite similar structures: I made molds from either super sculpey firm polymer clay or from two-part silicone. 


I also know where every piece came from originally: Pieces found on formentera, pieces gifted from friends and their trips abroad (yes, I get shells and glas and wood and strange items as holiday gifts from friends. they know me so well!)


I not only used sea life "structures" like shells but also ornaments and flowerlike structures. 


And now, even if the images are always difficult with the contrast, I also have to show you images of how the reflect in the sunlight! 


Uhm... by the way the pictures were made at the last minutes possible before being wrapped and Rumpel and me heading on our way from Leipzig to Göttingen at the 24th. 


All these shades... love them.


And of course ammonites. Everything needs at least one, nai?!


Here you can see how different the metal and the colours is looking in the sunlight and in the shades. The upper part was bathing in sunlight and the lower was in the shadow.


And you really have this change also on reality! 


PS: Can you find the tentacles? ^^

Freitag, 3. Januar 2014

"Deep down" - Polymer clay earrings


One of the essential things I think that makes a difference in creating is whether you really fall in love with your work. Maybe not love, every other strong emotions even down to hate may be fitting, but tht there is a deep emotional connection between your work and yourself. I am writing in this blog quite often that I have new favorites (earrings, beads, you name it!). It sounds maybe a little bit... mh... fast changing and variable but it is the truth. I so love these earrings. I already loved the beads that I made some time ago (with polymer clay and swellegant, have a look here). But the combination with the czech glass beads, the tiny metall elements, all the colours and (even though you can't see it in a static photo) last but not least the movement. They speak to me, they resonate with me deep down :)


Some details because I really love all the surfaces and colours in these earrings. See the patina of the beads? The little flakes and crumbled brass pieces after the oxidation process?

There is a little bit more of a green hint in the beads but I couldn't capture it perfectly... :/


Also have a look at the glass beads. The light blue nearly being clear shining between the subdued ends. Also the little metallic drops add to the movement of the earrings.


Of course I had to try different kind of background for the photos. As much as I love this it is not fitting for such long earrings. But still a neutral as well as interesting background. Maybe for other jewelery in the future :)


I know I already am complaining over and over that my camera is not really working anymore. It was so difficult to get clear photos. *sighs* I still wanted to show you a hanging photo version...


...as well as the backside because I had a hard time to decide which side of the beads I would prefer. I stayed at the original "front" side because there are more layers of patina and structures but I do like that both sides are great to look at.


PS: The czech glass beads I got from "the curious bead shop" :)

LinkWithin

Related Posts with Thumbnails