Sonntag, 13. September 2009

Tentacle cakes...

Whatever you can do with fimo, you can also do with marzipan! Just bigger... (and cheaper...). But to be honest I created tentacles earlier with marzipan than with fimo. I was just something I found suitable for a cake. So the first tentacle cake was a brownie. I have to apologize for the bad quality of the picture, but you know, it was only a small handy camera avaiable and as it was to be send as a birthday present there wasn't enough time to get a better camera.

The next two tentacle cakes were also for a birthday which was combined with a meeting (or something like that...). The first one is also a brownie. The second one is an apple cake with marzipan.
For the next cakes being so pale like the apple cake I think I will color the tentacles. I am not sure whether I would rather paint it with food coloring or if I just incorporate the color into the marzipan. The lats method would be easer and faster but the first one gives the possibilty for more "realistic" appearance... so... I am not sure...

Freitag, 11. September 2009

Donnerstag, 10. September 2009

Two fimo-decorated bottles...

Sooo, finally you here a word from me (Lachafa), too. After some posts from Saraccino, I tought it was time to upload some of my works. :)
At first I wanted to show you two things I made sponatiously, I think they came out sweet.
So, this are two tiny (yeah, empty!) bottles of vodka decorated each with one polymer clay-made lizard.This was my first one. I didn't plan to put it on the bottle first, but when I spontaniously tried to, it fit very well and looked cute.Aaand here's the second one. It has less girly colours since I made it for my boyfriend. :DI like the picture where you see the "back" of the bottle and the downside of the lizard. I think it will look marvelous with some coloured liquid inside.

Mittwoch, 9. September 2009

Our workingspace...

...just for you to get an image how we were working on our fimo sessions. I am surprised that it looks quite... well... not so chaotic like I feel it is during working there. It is the dining table and because I visit Lachafa for our sessions I have to bring a lot of things with me (she also has to grab her things to bring them downstairs). So it takes some time to gather everything, arrange it, get me my coffee,start the music, eat some sweet, say hello to everyone... until we can start.

Seahorse

This was inspired after the book of Christi Friesen "Under the sea". I cannot wait for the next book to arrive. It will be "Down under".

The most importent thing I learned of her is to adjust pearls for decoration of your workpiece (made out of fimo / polymer clay) with wire. Just turn a little piece of it through the hole of the pearl, twist ends together, so there is only one strand and use this strand like an anchor for setting the pearl into the clay. And even if it may fall out afterwards, with these wire / anchor you can clue back and the clue will get a stronger hold inside the fimo.

The other (also most important thing... I know, this may be a little bit contradictory... but at least Lachafa will understand) thing I really apreciate (and don't really know why we didn't discover / try it on our own) is that more... is sometimes really just more! Never refrain from putting some more decoration stuff on your workpiece! Here a bobble, there a pearl, here a string and there a curl...


The basic for the seahorse was also a mixture of different colours of fimo. I will try to make a new foto (as soon as somebody will lend me his digicam...) because the coloring of the seahorse is not a true one although the picture was taken at daylight.

Octopus number 3 - the small blue one

As you may already noticed, all my tentacle critters have these nice evil look. I adore them for it and wouldn't have it otherwise. Here I worked with dark blue Fimo (polymer clay). I never use a single color for the body but work some different, a little bit contrasting colors into it. You can see it especially at the pictures of the first one. These textures are never really obvious but I think the make all the difference in the end. I also used acrlyc paint for the blue one (I am still afraid to use any of it on my first one... it is, after all, the first... although I think it just would gain of it...). Paint it on, scrub it of... Just several rounds of it until I was satisfied with the result.
The upper fotos are showing a little bit a too light blue and the lower ones are a little bit to violett. The color is something in between.
The red and the blue one.
All three together!

Montag, 7. September 2009

Octopus number 2

This one is also made of fimo (polymer clay). Slighty bigger than the first one but not really much. I worked with acrylic paint as coloring after baking the fimo. I painted it on the surface and scrubbed it down afterwards.

Pay attention to the evil glance!


Just the varnish is missing.On both on them... it would save the surface, but I am not sure now whether I prefer it with varnish or rather without...

My first octopus made out of fimo...

...not the first octopus in general (there are already some painted one, some made of other material, etc...).

I justlove them! There are so cut! In reality even more than all sculptures, pictures or paintings may suggest. Nevertheless, at the moment I am just wearing this octopus necklace!

Small blue frog

Also from today's (or rather yesterday's) handicrafts session with fimo!

Small, blue, sweet :)

Sonntägliche Bastelsession (dominical handicraft session)

Dieser Blog soll vor allem für Lachafa und mich dazu dienen, ein wenig von unserem Gebastelten zu zeigen. Bei jedem Bild sollte man sich dafür auch vorstellen, wie gerade mit halb quitschender Stimme gesagt wird: "Schau mal!"

Diesen Sonntag haben wir es wieder geschafft zusammen zu finden, bei Kaffee (ich), Orangensaft (Lachafa), Chaos und Familie! Vielen Dank an das Essen @Tophino! :)

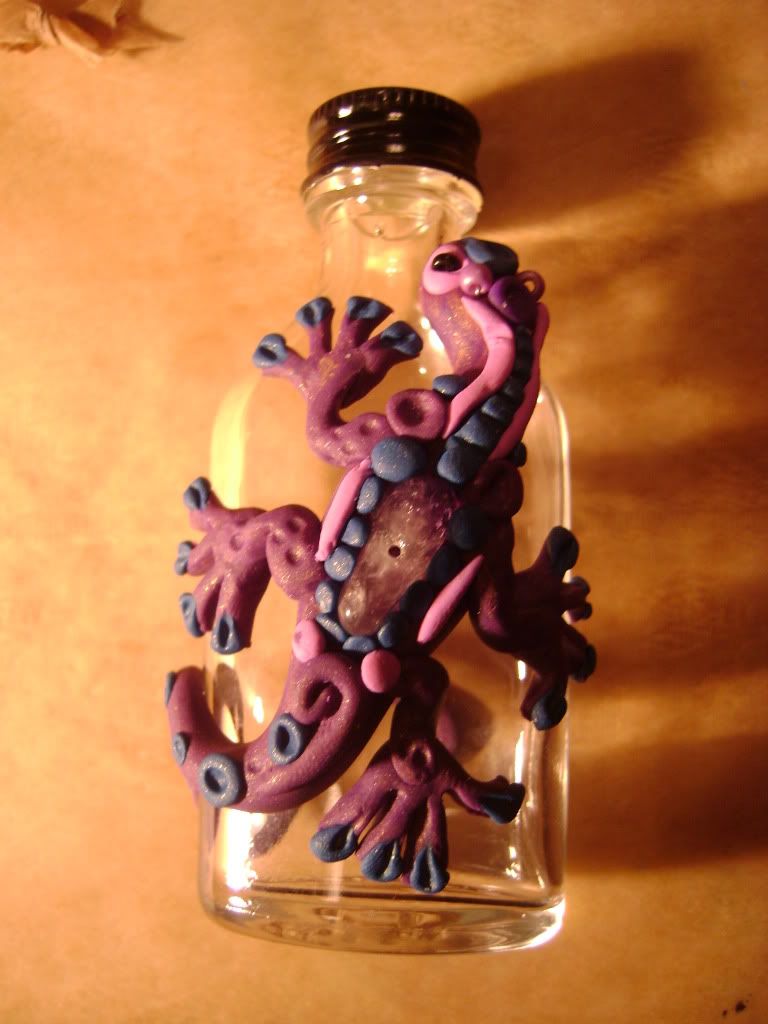
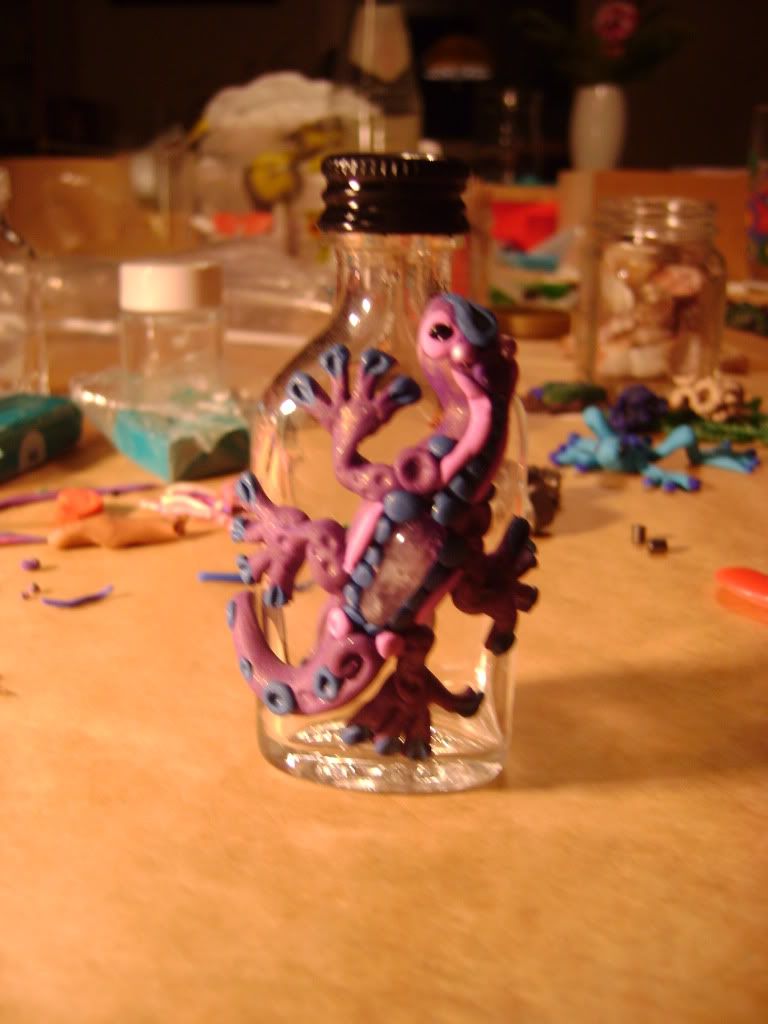
Als Anlaß diente das Buch von Christi Friesen "Welcome to the Jungle". Mehr zu ihr findet ihr unter: http://www.cforiginals.net/

Ich hab dieses Mal vor allem an einem Hochzeitsgeschenk gearbeitet (die Mutter der besagten Nähhilfe beim Katzenkissen heiratet und ich bin als Brautjungfer dabei). Einem Bilderrahmen, Foto kommt dann noch dazu.

Der kleine blaue Frosch, der auf einem der Bilder mitten im Bilderrahmen sitzt, wurde extra gemacht. Nur als kleiner Größenvergleich ;) Die Bilder sind leider sehr unterschiedlich von den Farbe, da sie entweder mit Blitzlicht aufgenommen wurden oder eben mit normalem Raumlicht. Aber ich denke, man erhält einen Eindruck der wahren Farben. Bei Gelegenheit wird mal ein zusätzliches Bild bei Tageslicht gemacht (sollte es nicht vorher doch schon verschenkt worden sein...).


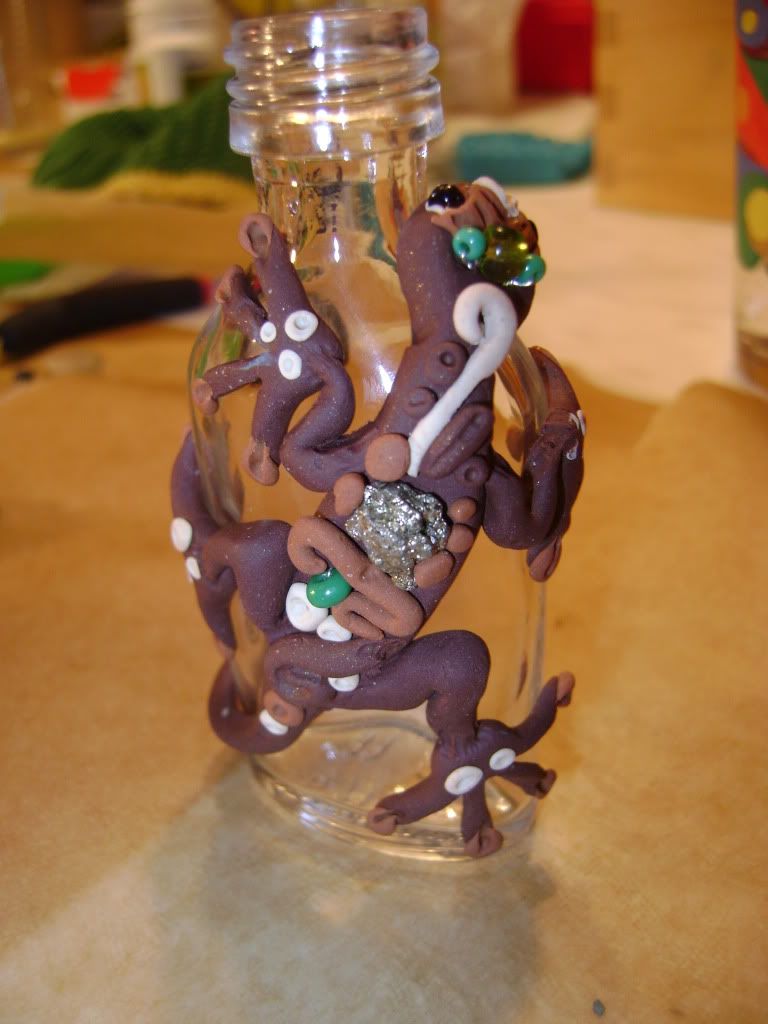
Wie man sieht, ist leider nach dem Backen ein Blütenblatt unten abgebrochen, aber das wird dann nochmal mit Sekundenkleber befestigt. Sekundenkleber werde ich auch generell noch unter einige Stellen zur Sicherheit fügen, daß ja Fimo sich nur gerne mit Fimo verbindet und somit die Gefahr bestünde, daß all die Blätter vom Glas fallen.

Samstag, 5. September 2009

Katzenkissen (cat pillow)

Da ich gerade dabei bin mich hier durch die Befehle und Möglichkeiten des Blogs zu arbeiten und alles auszuprobieren, gleich mal das nächste. Das Kissen ist ebenfalls ein wenig älter, dürfte schon an die zwei Jahre mindestens sein. Grundlage für das Kissen war ein Rest fester Leinenstoff (IKEA), dazu ein wenig Dupionseide und Borte. Die Katze ist einfache schwarze Baumwolle (IKEA schon wieder). Als Idee dienten die Katzen von Emily.

Ich hatte fleißige Nähhilfe... ("Was soll ich machen? Ich kann das nicht! Ahhhh... ich schneide daneben...") ...eben weil es ein Geburtstagsgeschenk für die Mutter der Nähhilfe war.

Am Ende frage ich mich immer wieder, warum ich sowas nur für Andere herstelle und selbst kein Katzenkissen besitze.


Tentakel - Ohrringe und Anhänger (tentacles - earrings and pendant)

Ich habe mal vom vergangenem Jahr Weihnachten den etwas hervorgeholt, um ein wenig mit dem Blog zu spielen. So als ersten Eintrag...

Die Tentakel sind aus Fimo, die türkisen sind zu Ohrhängern verarbeitet worden und die goldenen (mit ein paar mehr Tentakeln natürlich) zu einem Collier mit passenden Ohrhängern.

Alles im Zeichen des Octopus! Tentakel sind so unglaublich süß!

Das Fimo ist lackiert nach dem Brennen. Die Metalösen sind vorher schon in das Fimo eingearbeitet worden. Es waren allerdings meine ersten Versuche dieser Art und ich hab den Fehler gemacht, einfach nur gerade Stifte mit Ösen zu verwenden. Fimo ist aber kein Material, das in der Lage ist sich mit anderen Materialien, wie Metall, zu verbinden. Das funktioniert nur mit Fimo selbst oder anderem polymer clay (da kann man meistens gut mischen). Mittlerweile biege ich die Stife der Ösen, so daß sich das Fimo um das Metall drumherum lagern kann und so das Ganze besser festhält (im wahrsten Sinne umschließt).


LinkWithin

Related Posts with Thumbnails