Posts mit dem Label sea urchin werden angezeigt. Alle Posts anzeigen

Samstag, 10. Januar 2015

Creating new components - I added more metal to my work!


Some components like these ones you may already have seen in my former blog entries. But I just have to show you my newest ones. Okay, that is not exactly true: The shell and sea urchin I already created some time ago. But they were christmas presents (one for my brother and one for the friend of my sister). Just simple necklaces: The bronze clay pieces as pendants combined with grey waxed linen. 


Next to my dremel for drilling and polishing and so on... I also got the dremel torch! This allows me to actually work with metal clay like the bronze clay (this is a version which works in small pieces with a torch) as well as to solder or just anneal metal.


I need to anneal the metal in order to hammer it again and again... like the long stick-like shape or connectors or whatever they could be. I use them for earrings. The rings are copper wire soldered with silver hard solder since I also want to hammer them. Also you can see the backside of my little bronze clay pieces :)

And just so you can get an idea about the size: My universal ruler - the hand!


Oh, by the way, do you know what "new" tool I discovered? That works perfectly for metal as well as polymer clay? Emery boards for nails! Of course I have sand paper and fabric, polishing cloth and all the same for my dremel... but nothing beat the emery boards in the ease to use and hey, they are not expensive. Maybe after all I even may start polishing my polymer clay beads a little bit more ^^

Donnerstag, 9. Januar 2014

"Memories..." - Picture frames


I struggled with this blog entry. You may see why: Too many pictures... and what picture to put on top? I now went quite randomly because I honestly couldn't choose! 


I made picture frames with polymer clay (fimo classic) or rather I covered bought picture frames with polymer clay. I went for some cheap frames made out of wood so I could bake them. There were at the bigger frames some plastic parts attached but I could remove them safely and attach them back on later. If you also want to wrap frames in poylmer clay, have a look if you really can bake every part!


This said: I also used kato polymer binding medium or paste on the smaller frames. I was afraid that the polymer clay would not have enough grip to attach securely to the smooth surface. It was a mess but worth it: Was holding perfectly (yes, I tested it). It was not necessary for the bigger frames because they hade some rather ugly "raw" wood structures on top. Real wood made looking like fake cheap wood. Strange world. Afterwards I used the swellegant paint line from Christi Friesen to create this old and worn look.


It was late in the nights while I was working on these picture frames. Hey, at least I made some pictures of the process. I sadly forgot the first ones as comparison where you could see the original polymer clay colour (it looked weird ^^) but I have several ones to show you the process of adding the swellegant paints and patina on top.


I added several layers of brass or bronze paint from swellegant on the baked polymer clay. I always waited to let it really dry before I added the next one. Just with the last layer I added the three different solutions to let the metall oxidise while the paint was still wet. The solutions overlapped of course but I added them still at different spots. Just tipping generously on the surface. You see how beautiful the patina is blooming?


I also love this look when the patina is dried. The green and the light spots...!


But I wanted to have more layers of colour so I added a lot of different oxide dyes on top. I think I nearly used all the shades of blue and green avaiable from swellegant and also some purple and white. 


Again I added it randomly over the frame. It is hard for me to do this but I know that this creates the effect I am aiming for. 


I already rubbed of some of the patina and you can see the brass beneath ^^ Just because I am working really in a generous way with the paint, acids and dyes!


Afterwards I rubbed on some more of the metall paint on top. Just with a nearly dry brush I took a little bit paint, went over a paper several times and then went over the frames. This allows me to get paint on every small structure without just overpainting it. And yes, for this I am using a brush and not my fingertips (normally I am adding acrylic paint on my polymer clay pieces my hand ;)).


Just a comparison before and after rubbing on new metall paint... also the first layer of the sealant is on top of the right one. That is why it looks a little bit wet.


 And here the overview of the finished frames: two made with brass and two made with bronze.


I think the bronze makes better images... but seeing the frames in reality the brass is more striking and the bronze more subtle. 


The discussion now would be what to put inside... I would be voting for simple black and white or sepia pictures but as all four of them were christmas presents, I don't have a vote ;)


But I so need to make one for me. At least one... but you know how it is with creating something for oneself? Always at the end of the list somehow.


 And sorry... but I just can't delete more images. Believe me, I already deleted a lot from this blog post!


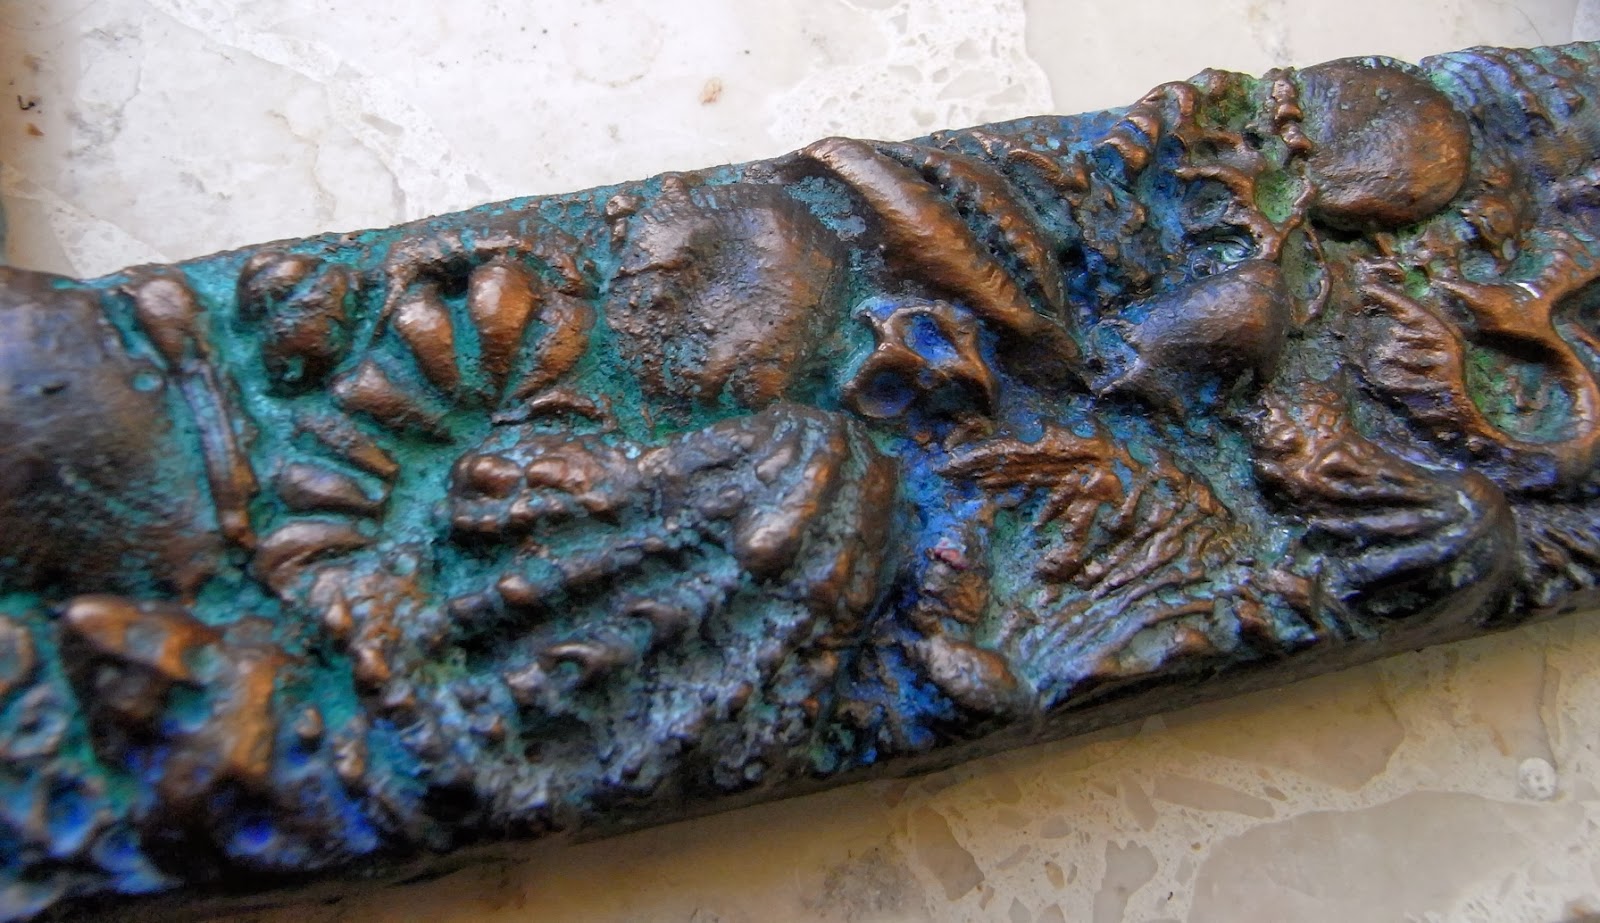
Just look at all the small details...


As you may already have imagined from the repeated and quite similar structures: I made molds from either super sculpey firm polymer clay or from two-part silicone. 


I also know where every piece came from originally: Pieces found on formentera, pieces gifted from friends and their trips abroad (yes, I get shells and glas and wood and strange items as holiday gifts from friends. they know me so well!)


I not only used sea life "structures" like shells but also ornaments and flowerlike structures. 


And now, even if the images are always difficult with the contrast, I also have to show you images of how the reflect in the sunlight! 


Uhm... by the way the pictures were made at the last minutes possible before being wrapped and Rumpel and me heading on our way from Leipzig to Göttingen at the 24th. 


All these shades... love them.


And of course ammonites. Everything needs at least one, nai?!


Here you can see how different the metal and the colours is looking in the sunlight and in the shades. The upper part was bathing in sunlight and the lower was in the shadow.


And you really have this change also on reality! 


PS: Can you find the tentacles? ^^

Donnerstag, 6. Dezember 2012

Advent calendar - 4th


Today a little hairpin made with polymer clay (fimo). I used a mold I made from a sea urchin. I painted the polymer clay with acrylic colour and sanded / buffed the surface afterwards to get the white really pop up! 


Mittwoch, 1. August 2012

Sea urchins - dark green


This are some of my last sea urchins I made with polymer clay (fimo). Not the only ones but I didn't make jewelery out of the other sea urchins until now. Even if I already chose most of the beads which I would love to combine with the other sea urchins, I am not happy with all colours and also I am tempted to change the arrangement of the earrings themself. 


So even if these earrings made their way to my shop, the rest will still need some time! I even took them with the to formentera for some sanding and new colours ^^


Here you can find the other sea urchin earrings I already made :)


Mittwoch, 23. Mai 2012

SMS giveaway - sea urchin earrings


I never got to take part in the sew mama sew giveaway day (sms) before. I just always took my chance with all the other participants which gave the possibility to win some of their beautiful stuff. Even now I am a little bit late...  

...better late than never, mh? ^^

So here we go! For the sms I'd like to give one of my sea urchin earrings!


I already showed you the first of my sea urchin earrings (I am still in the process of making new ones and to experiment with colours and materials). And yes, I'll also show you more of the process how to make them but this may still need some time. I just got my date to defend my thesis! Finally! HA! And this will (for sure) occupy a lot of my time in the near future. But I already started to write about the first steps of making the mold... so have a little patience. :)


The earrings are made from a silicon mold (from a real sea urchin from the mediterranean sea, better to say: from Formentera!) with polymer clay (fimo). I drilled little hole inside with my dremel and painted the surface with different kind of acrylic colours (classic ones, aqua acrylic paints, metal effect). I tried to take pictures from the earrings with different light sources and background but it is difficult to catch the real colour. They are in shades of blues, a wee tiny bit green and bronze and copper accents at the top! 


Now for the rules part... Yes, rules, there are always rules ^^

- the giveaway is open to all (as long as the mail service may reach it ^^)
- the giveaway will be open until May 25 at 5 p.m. PST 
- the winner will be noted by May 27 

Please be sure you'll leave me a way to contact you! Either you have included / attached your email adress to your account or otherwise write it down at the comment section (just like this name (a) host (dot) com so your email won't be found by searching engines). 

For a chance to win leave me a comment and tell me which of my earrings (I made a lot of earrings ^^) in my blog you'll like best. 

If you're a follower, just leave a second comment for another chance to win :)


There you go!

PS: And of course I'll add some crafting stuff also! If there is anything you are really interested in, don't hesitate to mention... chances are there you may be lucky ^^


Mittwoch, 16. Mai 2012

Sea urchins


I love the structure and surface of sea urchins. They are so delicate and all the colours! Since I was a little child we went to formentera every year and there one could find a lot of the typical sea urchin most people know. Which is the leftover of a dead sea urchin ^^ 


We found tiny ones and big ones... and from my collecting I tried one to make a silicon mold of (I'll show this one to you in another post!). During the process the sea urchin itself was destroyed.. *sniff* ...but I like the resulting sea urchins I could male with the mold and with polymer clay (fimo)!


I drilled little holes inside with my dremel (love this multi function tool!) and treated the surface with aqua and normal acrylic colours. I already made several ones but still want to get more experience with it! And also I want to find a tinier sea urchin to make really tiny polymer clay sea urchin beads! :)

PS: And yes, I am starting to add more and more of my earrings to my online shop at dawanda! :)


LinkWithin

Related Posts with Thumbnails