Posts mit dem Label hairpin werden angezeigt. Alle Posts anzeigen

Sonntag, 1. Juni 2014

"Little skulls" - Polymer clay tutorial


Uhm.... to be honest, I forgot about this tutorial. As you may see from the hairpin with the skull... this was part of the advent calendar I made for my sister 2012 (I made advent calendars every year for family and friends). I made more little skulls and they were all used to create hairpins. Even if the quality of my pictures is not the best, I thought after I stumbled over it again, it would be nice to show you! :)

On a sidenote: When I brought them to the fair mostly men bought them... and used them as a tie pin! Have to find some blank for tie pins and made real ones ^^

I started with white polymer clay (fimo classic). I used leftovers with little dust in it so this tutorial is perfect for leftovers like this (and we all have polymer clay with dust in it, nai?)!

I rolled a ball, roughly formed it into some kind of pear and pressed it down. For this step as well as all others in this little tutorial: Dont try to make anything perfect! There is NO need for perfection! It would rather take away the organic and funny look. Also: Embrace your finger prints, they add texture ^^


I used mainly a knitting needle and a scalpel (or sharp paper knife) for the modeling. Now I would use my ball point tools but you really can use anything you find in your household. Pens, kitting needles, other end of a brush, wooden food sticks... you get the idea.

I pushed in the edges to get a more pronounced "skull" shape. Still you can see the imperfect rough edges. I then started with the eyes. Just a dot in the middle and then I pushed the holes bigger (circulating the knitting needle gently inside). I like the big eyes! 


A simple heart shape for the nose (or rather the missing nose... ugh...!). I gently pressed don the lover area for the teeth and then simply pressed lines down.

You have your skull!


For variations: Cut out a single teeth... make different eye shapes...


...make them angry or worried... a bigger rounder head is also cute as is my favorite: Different eye sizes!


Also nice is to create the teeth by just cutting with the scalpel one horizontal line and then several vertical ones. This has the look of a skull with the lower jar still attached.


Last step: Paint everything with black acrylic paint (I used Reeves) and wipe it away while still wet. Then just sand the surface of the skull to enhance the white there! That was it, easy as easy can be ;)

Of course you could also add some colourful flowers to get a more mexican style. Use brown or grey insteadt of black to create a softer, not so comiclike effect...

from the advent calendar

Sonntag, 13. Januar 2013

Advent calendar - 20th


I had to include one of my fabric flowers. The last ones I made were all done with old jeans scraps. I really like to make these little flower hairpins. They are a great use for fabric leftovers (creating new things and use up the stash... to throw away fabric is... hard... even if there are just scraps leftover... so a win / win!) and so relaxing to create. Also a good project while traveling!

Dienstag, 18. Dezember 2012

Samstag, 15. Dezember 2012

Advent calendar - 11th


Do I need do say anything about this? A little skull made out of polymer clay (Fimo classic) and glued on a hairpin :)

You will get a tutorial for little polymer clay skulls soon. Just have to edit the pictures... ^^


Donnerstag, 6. Dezember 2012

Advent calendar - 4th


Today a little hairpin made with polymer clay (fimo). I used a mold I made from a sea urchin. I painted the polymer clay with acrylic colour and sanded / buffed the surface afterwards to get the white really pop up! 


Mittwoch, 24. Oktober 2012

Flowers - how to use your jeans fabric scraps!


I had a lot of jeans scraps lying around. I made a big pillow out of old jeans (still not finished or rather stuffed ^^) and had a lot of fabric leftovers. 


Perfect to sew glas beads on top and stitch some knots around it with coloured thread! (this is crochet thread, the same I use for my crochet earrings, I just love the bright colours!)


The come in all colours and sizes...

...and even some other fabric leftovers sneaked in ^^ Really fast and easy to make! 


Montag, 25. Juni 2012

The whole range of flowers!


I made quite a lot of them over the past weeks. Only one in time, but using up my fabric leftovers and over stuff. Some of them I can't show you, I forgot to take pictures before bringing them to the fair.


You can see, just simple layers of circles with some beads and stitching but it creates a great effect! 


The black and white threads are originally some kind of woven polyester fabric which I sew on like the other fabrics and just in the end I remove all open threads which are not fixed due to the stitching in the middle! An easy way to get the flowery effect I think!


Otherwise I use really all kind of fabric leftothers...


...from cotton to fake green gras stuff...


I add some contrast with the thread I use for stitching. It needs some contrast and to more highlight the organic structures created with the beads.


An example of the back. I use either the brooch pins or the clip pins which can be used either as brooch or as hairpin!


PS: I sew and glue the pins onto the back! ^^

Montag, 26. Dezember 2011

Just the idea of a pink - hairpin...


This are two crochet yarns combined (one more a sand colour and the other more rose or a very light pink). So really more the idea of pink than a real pink colour ^^


I crochet a flower with the two yarns... and then put it around a hairpin with little glas stones :) A very fast and easy project! Of course part of the pink advent calender 2011....!


Sonntag, 21. August 2011

Alone - with pink fabric and a request


A friend asked me whether I could make some kind of hair accessory with a special fabric. His girl friend made a "Schultüte" which she covered with this fabric. The "Schultüte" was for his niece because she is starting school now and the official celebration with the school is today.

"Schultüte" is again a little bit of  difficulty to translate. Not because of the words but the meaning. It is (says leo dict) a large cornet of cardboard. It is filled with sweets and little gifts. In germany children gets them at their first day of school. Mostly one big one from the parents and from family and friends little ones... or everyone stuffs little presents in the big one from the parents :)


The request was just to make something for his niece hair. They didn't want to add more sweets ^^ So as you know me: I played. 


I'll show you my way of creating the hair clips because it is really easy. For this one I just cut out circles from the pink fabric and smaller circles of cord for the support of the fabric.


The hairpin already had the sparkling stones. I cut a little hole in one cord piece and put it in between the metal clips and the a larger cut (so the stones cut come through) to the other cord piece to put it on the top of the clip. I glued both pieces together. Then I cut the three pink fabric pieces (a long cut for the stones to go through). I just put them on top and added a little bit of glue between the single pieces. 


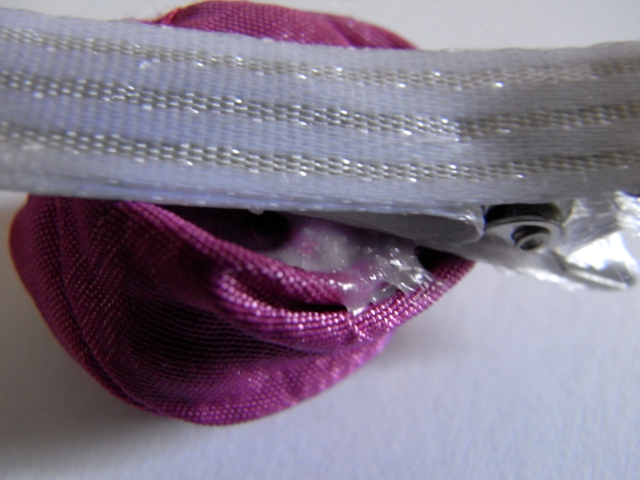
For the little rose I folded the fabric and sewed a large and narrow triangle with the wide side open. The fabric was turned and just rolled together to form a little rose. Some stitches and a lot of glue hold it together ^^


More glue hold the ribbon on the hair clip and the rose on top... That was all :)


For the last one just have a look here (or here for another one) :) 


This little heart I got from a granny swap as a little gift. I added some crochet strings and I hope it will make a little wristband for the girl.


By the way: If you like my hand carved stamps, have a look here to get some ^^ 

Montag, 20. Dezember 2010

A felt flower for the hair...


Like the bird, the pincushion and the owls made out of felt. I had this pieces left and though a flower would be nice. This one was also part of the pink advent calender.

I used black yarn for the stiching and the felt pieces are really just hold together with these few stichtes. It's enough and quite stable!

Donnerstag, 3. Juni 2010

Good night goodies... hairpins...

...fluffy.. in strange orange stripes...

...made of some curtains a friend wanted to throw away...

to be honest, I didn't wanted this fabric at first... but another friend just said "take it" and I was just well-behaved and did like I was told... for the better! Although it is a really ugly fabric, it makes fluffy and nice hairpins! ^^

I made three hairpins which differes in size only... still a lot of the fabric left...


..I use these small black hairpins to fix them... they are able to hold nearly everything... even my long and heavy hair...!

The big one alone... or the smallest on with the violett hairpin i made some time ago... and a black crochet flower Lachafa made for me :)

The ugly curtain...!


...just my stuff...
...I simply love stuff....!
(you never guessed, eh? ;)

LinkWithin

Related Posts with Thumbnails