Freitag, 28. Februar 2014

Patina compass challenge and Mojo- "Just fly!"

"Just fly!"

Yes, I know, I am late... not too late looking at my clock but still... To be honest I am glad I made it at all. Not because of the work itself but of getting some decent pictures. I really should make a decision what new camera to buy (but a new laptop has priority... sighs) because with no day light my digi cam is just defeated. I love my digi but finally it is in it's last moments. 


You know this moments when you would love just to crash the camera *put any technical device in her insteadt if you want*.. throw it against the wall? 

But enough of my rambling! Kathy invited us for a little challenge, she send us a compass rose and wanted us to create a patina on top with whatever we have at hand. Therefore I overcame my desire to buy vintage patinas right now (I need another motivation/excuse). 


Back to my compass. Somehow I wanted to go a teeny wee bit over the top and combine the compass with a wing bead (you can bead it = it is a bead) I made from polymer clay (fimo). I tried a lot with different colours on the metall compass but they all didn't come together with the wing. Until I pressed some clay against the back of the compass (I just love stamped metall findings!) like a mold and made a new compass.


Trust me you can't see any of the original colour anymore. I used the dye oxides from Christi Friesens swellegant in different blue shades and acrylic paint (Reeves) in paynes grey and white. 


A little closer look at the wing... and the facetted beads are czech glass beads from "The curious bead shop" and the other beads including the white stringed beads are all from recycled jewelery. 


I also added some patina on other findings... whereever I could. White acrylic paint and blue swellegant dye oxide.


Actually I may have to rearrange it because the white stringed beads are from an old necklace and it loves to turn around... but I really love the white against the other elements! Any idea how to solve this?


The piece above the compass is a brass finding I glued on some paper, sanded the edges off and sealed it. The little dangle on top is again made out of polymer clay and covered with bronze swellegant paint.

So... if you are still with me I hope you have also the energy to jump over and have a look at Kathys at BayMoon and all the over participants of the challenge! :)

Just right here: patina compass challenge

And speaking of challenges: This is also for Heather's "Jewelery Making Mojo Challenge", week 2 "Bead soup". After having my two main parts I really just grabbed what where lying around on my table and tried to make it fit! This is where the old stringed beads as well as my new curious beads came in... and why I put some paper on the brass finding in the middle because otherwise I was not fitting for me (I put a lot of different colours on top and sanded them all off again ^^).

Donnerstag, 27. Februar 2014

Rumpel - more of his work


This statue was made by Rumpel. He gave him no real name but calls him "dicker Mann". This belongs to his older work (I will show you more). Now he started to work again this time using polymer clay for smaller statues. Originally he made a kind of wax statue and then made a mold for casting. But seeing me working with polymer clay got him also to try it.

He uses now sculpey super firm because even fimo classic was to soft for him. I have to admit that I also love sculpey super firm to create molds! It holds all the details so perfectly and fimo classic does not really stick to the backed sculpey super firm. 


Rumpel also made the wooden frame for the man and he now hangs in our living room between the two windows. Like a little shrine ;) I tried to capture this in a photo... but our windows go out to the south. Maybe I will make one when the sun is not shining (but sorry to say this, I hope this won't be the case anytime soon! ^^). 

Freitag, 21. Februar 2014

Dragon flies, new shapes, challenges and bead mojo!


On earrings everyday they started a monthly earring challenge. They show you an inspirational image and the goal is (like the name of the blog already indicates ^^) to create earrings!

Here are mine. I went for structures, shapes and colours. Can you find all the matching details? ;)

The orange glass beads are old recycled ones I found in a second hand shop here in leipzig. They have some bowls with parts of broken jewelery inside. Yes, I nearly took all glass beads they had. Some of them are a little bit worn or old pressed glas but I love to work with something that already has a history. And hey, the orange is striking!

And then I added czech glass beads (the small green and big blue ones with picasso finish), some cotton thread, metal beads and the small blue beads are swarowski wax beads. 

I never ever worked with this shape before so thanks for the inspiration! :)

The inspirational image!

And just to add a little bit more interactions... This is also my part for Heather`s Jewelry Making Mojo Challenge.

The challenge of week 1 was: Take part in a challenge! 

Your Assignment: 
Pick a contest or challenge, make something or start something! Blog about it or share your entry on the Facebook group. 


Done :)


Freitag, 14. Februar 2014

Inspirations: Critter (Berlin)... or... lunch in Berlin!


I got this photo from a friend in Berlin (the one with the pink advent calendar!). Called: Lunch in Berlin (Mittagsessen in Berlin) ^^

In case you wonder: This was the view out of her window!

Montag, 3. Februar 2014

Blue flowers and a tiny wee beading tutorial...


Yes, a really tiny tutorial but hey, I already sketched it so why not show it? ;) 

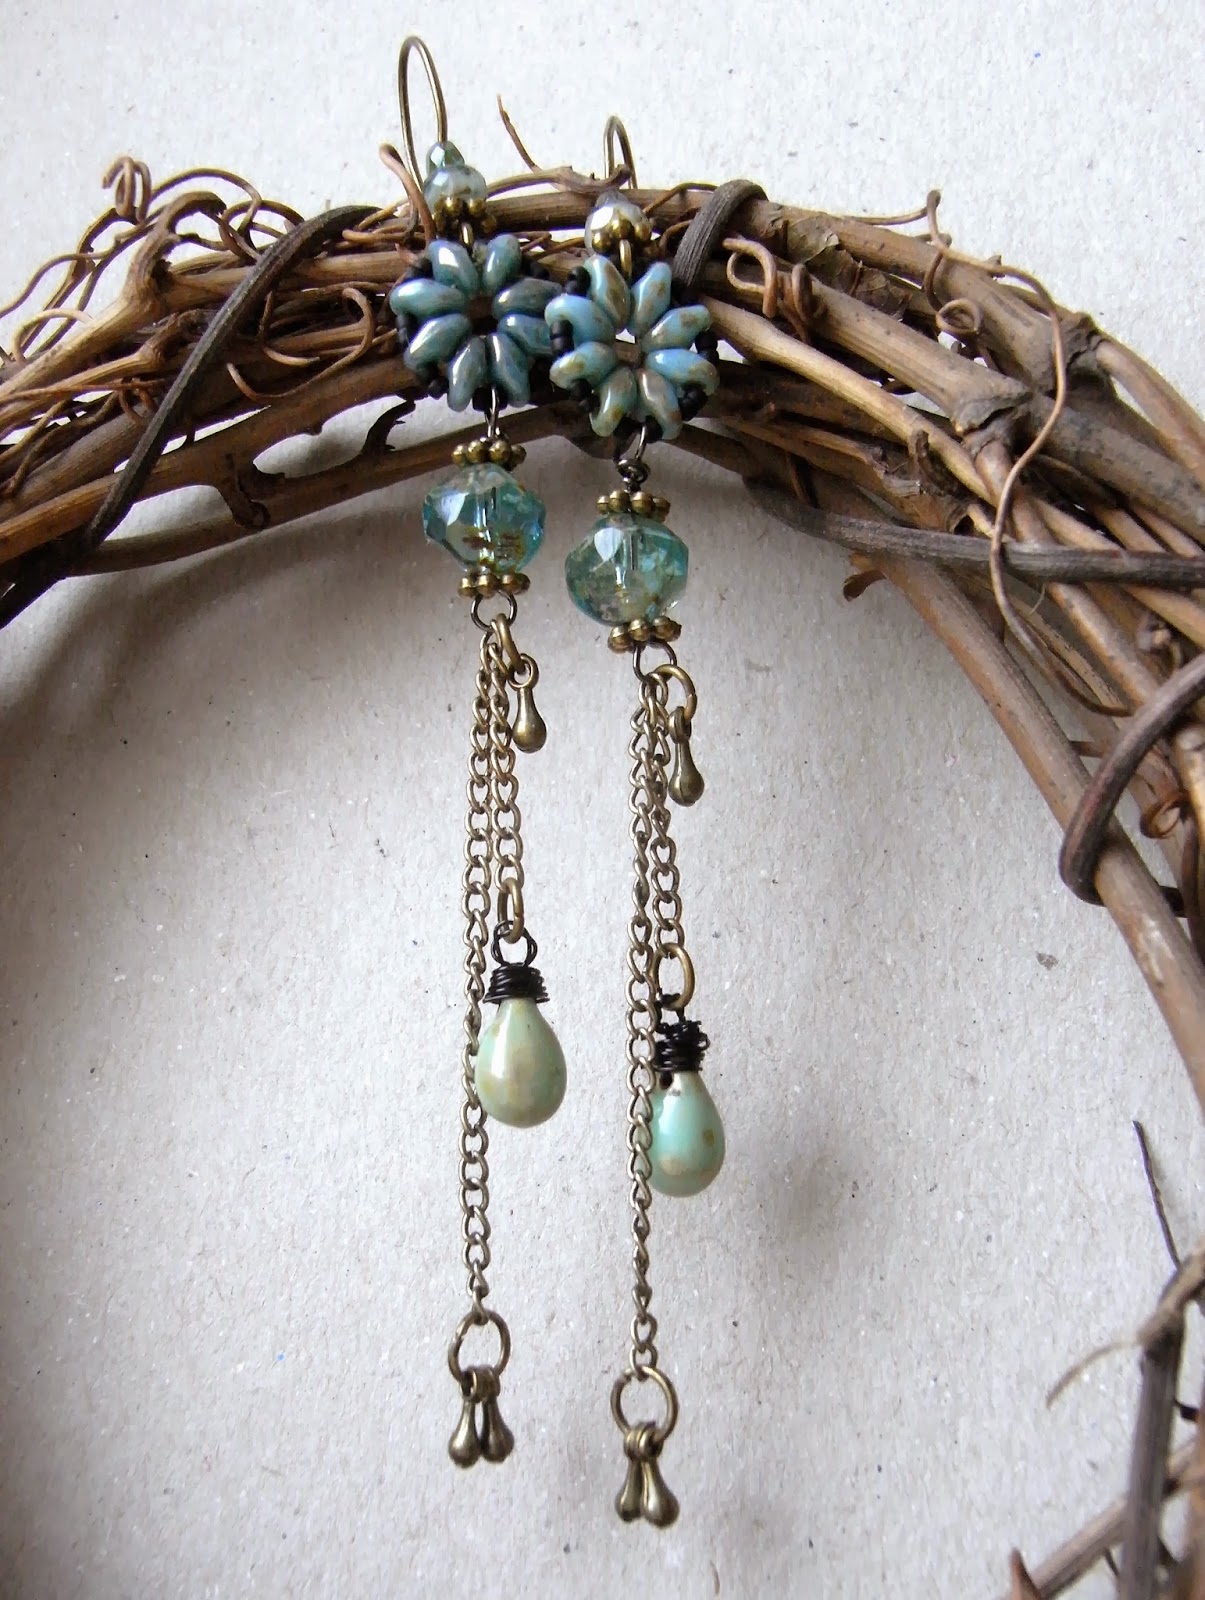
Heather Powers from Humblebeads gave out a Super Bead Sunday challenge yesterday. It was inspired by the super bowl in the US and while I am neither in the US nor a fan of this game... I loved her inspirational colour palettes and had to play along! 

I made with duo (twin) beads and seed beads (15/00) small beaded flowers (or also just circles / mandalas... you name it). They are really simple but I love their look. I added a lot of czech glas beads with picasso finish (I got them all including the duo beads from The curious bead shop), some chain and metall drops. 

There are quite long, without the hook 8,5 cm (3,5 in) and with the hook and the beads on it 10,5 cm (4,1 in). The slightly touch my shoulders if I move my head. But there are really light and due to this play nicely while moving.

Oh, and here my tiny wee tutorial!


String 8 duo (twin) beads. Go through the first bead again. Make sure you got through all beads 2 times in total (always the same hole) and make a knot to secure. Then  go with the thread through the outer hole of a twin bead, take 2 seed beads (15/00) and go through the next twin beads. Make sure the thread is hold tight. Again go through all beads in the outer ring 2 times and make a knot afterwards.

Yes, it is tiny... but this is how I write / sketch down things like this :)


 This was the first made-at-night picture... still not a perfect picture at top on this blog post but getting better... maybe with sunlight and a new camera the quality will increase again. *sighs*


Samstag, 1. Februar 2014

All the flowers! - new beads


I am playing with shapes, molds and colours. Here are some of my results that I really, really like. Strangely enough: At the same time I am not sure what to create with them! ^^ 


Uhm, yes... I made a lot of pictures. I tried to catch the different angles because especially the three dimensional bead shapes are difficult to catch.


Also I think it is important to show the backside of the beads. Especially because I may not keep them but sell them. The pictures holding the beads in my hand are a way of giving an impression of the size.


The same basic shape but a complete different bead!


I am trying to get my head around how to incorporate this bead shape into a design... also keeping all sides visible ;)


Sometimes I may even like the backside better... the real organic and random structures!


The size would be nice for earrings as well as necklaces or bracelets.


Again the same basic form but a different shape and white fimo classic used instead of turqoise/blue fimo classic.


The colour on top of all beads is acrylic paint from Reeves. For these last flowers I put on a coat of payne's grey first to tone done the other layers of colour. 


...all sides again... from the top to the side....


...to the back (or inside?)!


A little bit bigger than the last blue ones.


Oh, these art beads are no flowers... but made at the same time to test new structures, shapes and molds :)


And the back!